This guide is free and complete. Nothing is held back, and no account or payment is required.
Before You Start
This guide takes you from a PC that needs reinstalling, or a new machine with no operating system, to a clean, fully updated Windows 11 that is ready to use. Every step is illustrated.
It is written for modern PCs with UEFI firmware, which covers virtually every machine sold since 2013. If your PC is older and boots in legacy BIOS mode (CSM), some steps will differ.
What you need
- A USB drive of 16 GB or more. It will be wiped completely, so don't use the one holding your vacation photos.
- About 7 GB of free disk space to download the image.
- A valid Windows 11 license (see below).
- A decent internet connection: the file is between 5 and 7 GB.
- Ideally a second device — a phone or tablet — so you can read this guide while the PC reboots.
About your license
If you are reinstalling on a machine that came with Windows preinstalled, the license is usually embedded in the motherboard firmware (UEFI). You won't need to enter a key at all: Windows reactivates itself as soon as it goes online.
To check before you start, open PowerShell on your current PC and run:
(Get-CimInstance -ClassName SoftwareLicensingService).OA3xOriginalProductKeyIf a key appears, it is baked into the firmware and you are covered. If the line comes back empty, that is not a problem — it simply means your license is tied to a Microsoft account or to a key you bought separately. Keep it handy.
How long it takes
Budget an hour and a half to two hours in total, much of which is waiting rather than working. Downloading the image and creating the USB drive take up the first half hour. The installation itself is quick. Most of the remaining time goes into drivers and updates, which run in the background while you do something else.
Responsibility
You are working on your own hardware and at your own risk. This guide is provided for information only and is not tailored to any specific configuration: check that each step applies to your machine before carrying it out.
Download Windows
Go to: https://www.microsoft.com/software-download/windows11opens in a new tab
Scroll down to the section titled “Download Windows 11 Disk Image (ISO) for x64 devices”.
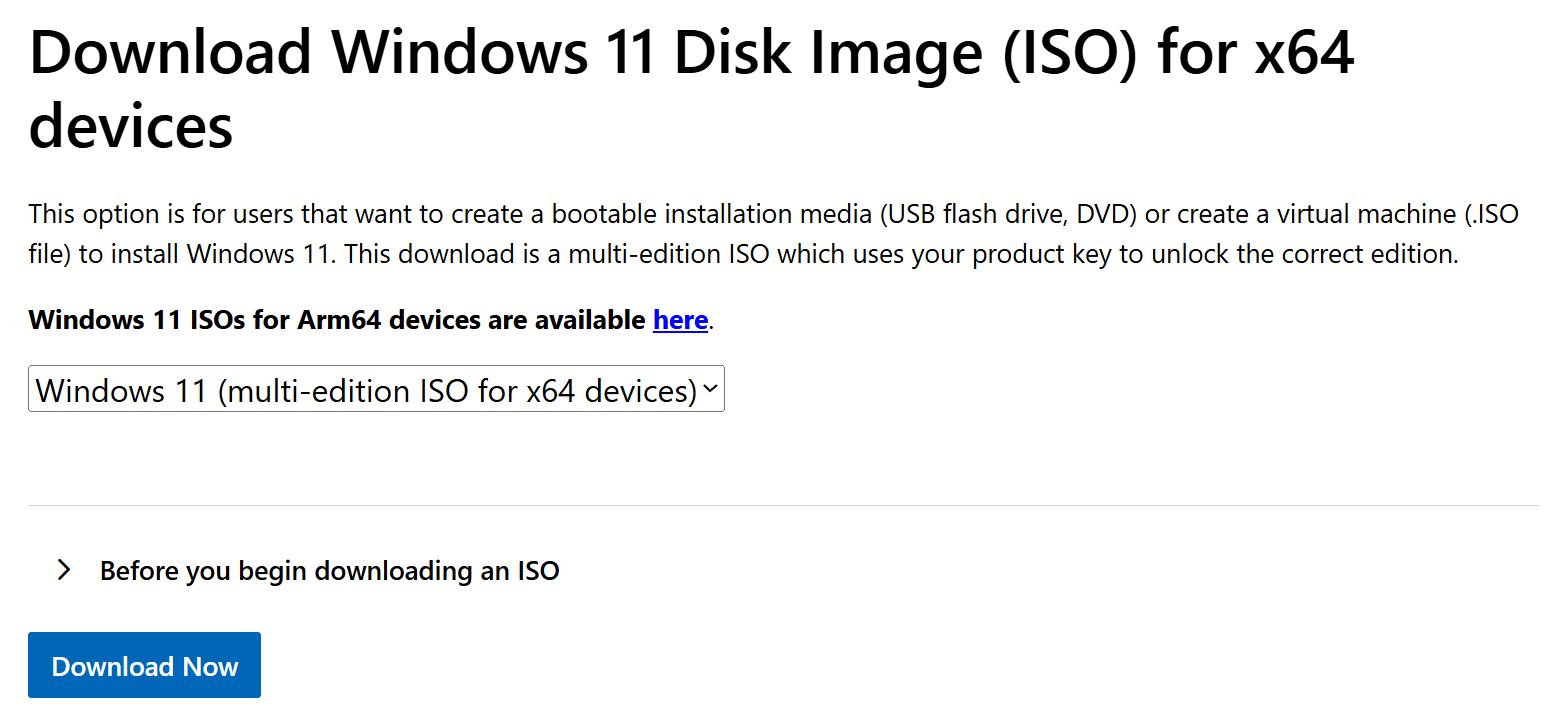
In the drop-down, pick “Windows 11 (multi-edition ISO for x64 devices)”, then click the blue “Download Now” button.
“Multi-edition” means a single image contains both Windows 11 Home and Windows 11 Pro. You will choose the edition during installation.
If your PC has an ARM processor — a Copilot+ machine with a Snapdragon chip, for example — this image will not work. Use the “Windows 11 ISOs for Arm64 devices are available here” link, just above the drop-down.
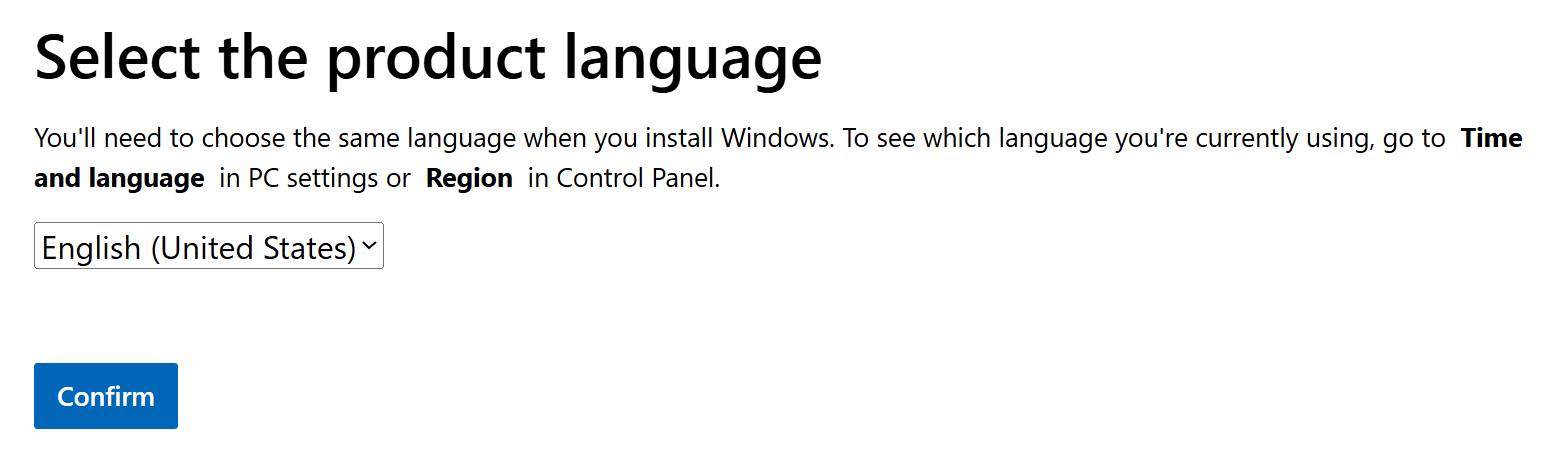
Microsoft then asks for the product language. Pick your language: this is the language your Windows will run in, and changing it later means downloading an additional language pack. Confirm your choice.
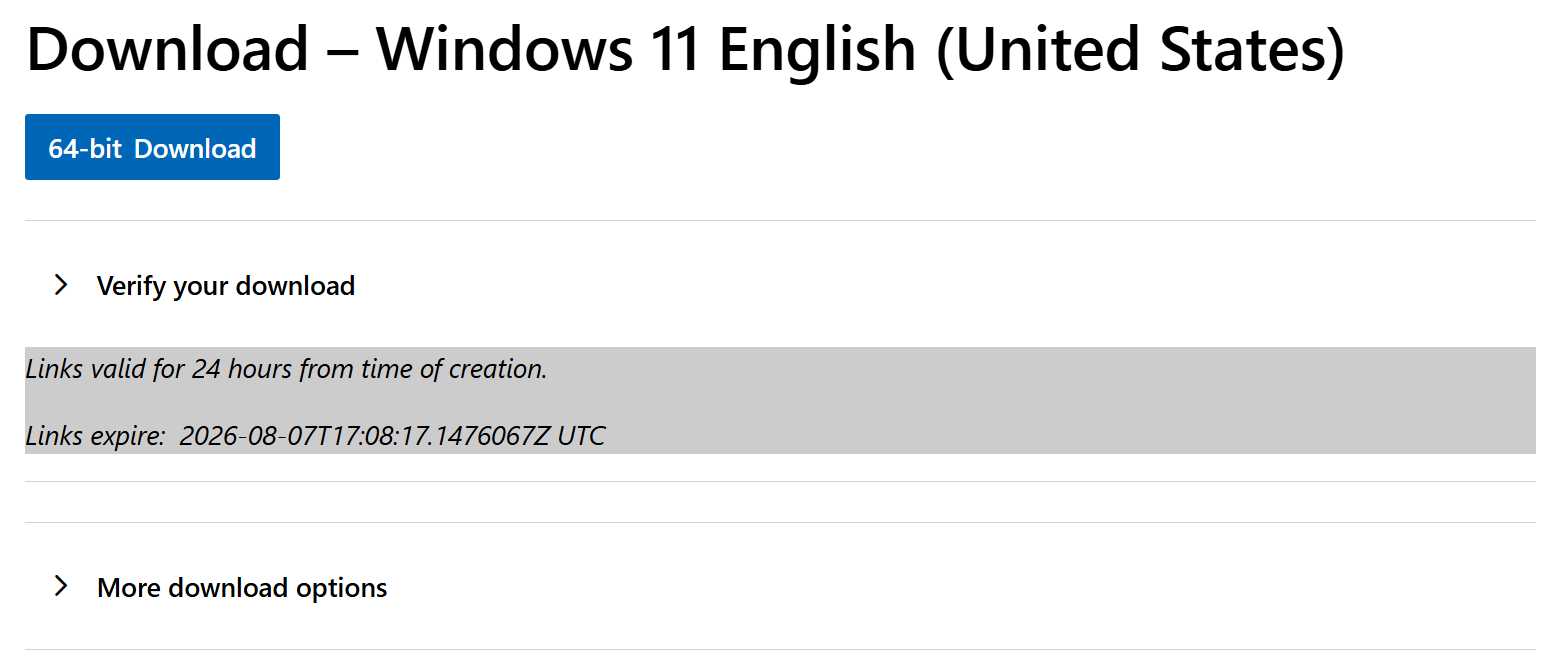
Click “64-bit Download” to start the download.
Verify the file (recommended)
On the same page, expand the “Verify your download” section. Microsoft publishes the SHA-256 hash of the image there.
Get-FileHash "$env:USERPROFILE\Downloads\Win11.iso" -Algorithm SHA256Nothing will happen for anywhere between 30 seconds and a few minutes while PowerShell reads the entire file. There is no progress bar and the prompt does not come back — this is normal, let it run.
Rather than comparing 64 characters by eye, let PowerShell do the comparison. Copy the hash from the Microsoft page and paste it into this command:
(Get-FileHash "$env:USERPROFILE\Downloads\Win11.iso" -Algorithm SHA256).Hash -eq "PASTE_THE_HASH_FROM_MICROSOFT_HERE"It answers True or False. Capitalization is ignored, so there is nothing to get wrong.
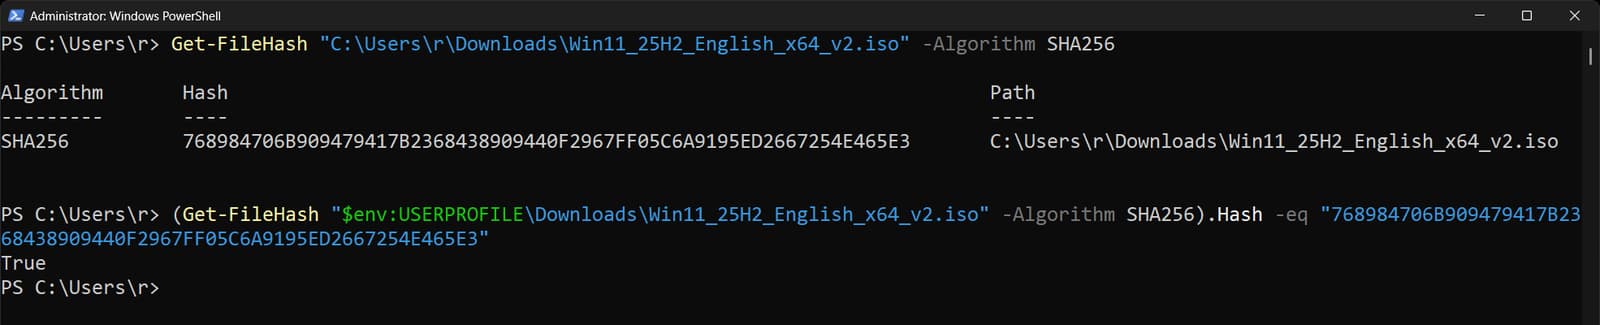
True means the file is intact. False means either the download failed, or you compared against the wrong language — check that before downloading the whole thing again.
Create the Bootable USB with Rufus
Rufus is open source, but it only runs on Windows.
No Windows PC handy?
Three options:
- On Linux: Ventoy. You prepare the drive once, then simply copy the ISO onto it. If your PC is fussy about UEFI or strict Secure Boot, use WoeUSB-ng instead.
- On macOS: WinDiskWriter, built specifically for creating Windows installation media from a Mac.
- Neither of those, or you'd rather not use a terminal: borrow a Windows PC for fifteen minutes. Downloading the ISO works from any system; only writing the drive needs Windows.
macOS: https://github.com/TechUnRestricted/WinDiskWriteropens in a new tab
Linux (Ventoy): https://www.ventoy.net/en/download.htmlopens in a new tab
Linux (WoeUSB-ng): https://github.com/WoeUSB/WoeUSB-ngopens in a new tab
Download Rufus
Go to: https://rufus.ie/en/opens in a new tab
Scroll down to the “Download” section.
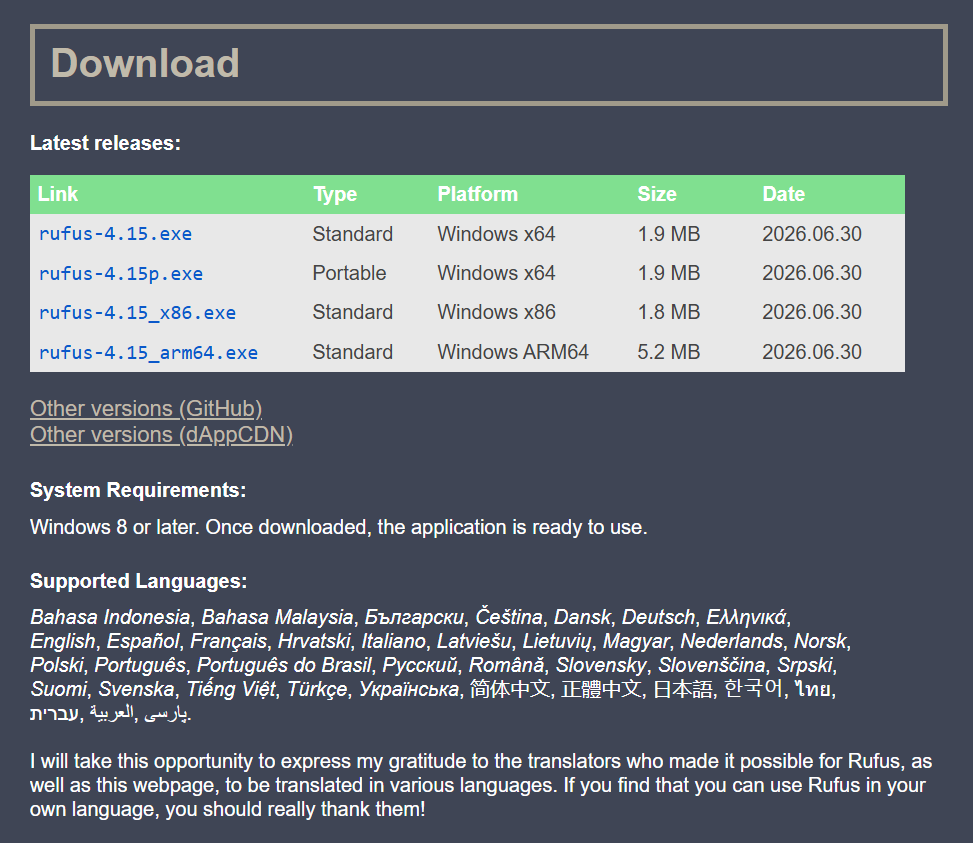
I recommend the portable version — the second one in the list, named rufus_x.xx_p.exe. It doesn't install anything and leaves nothing behind on your system.
Once downloaded, double-click the .exe. Rufus asks “Do you want to allow Rufus to check for application updates online”: answer No.
Now plug in your USB drive, ideally into a USB 3 or faster port (the blue ones, or those marked SS).
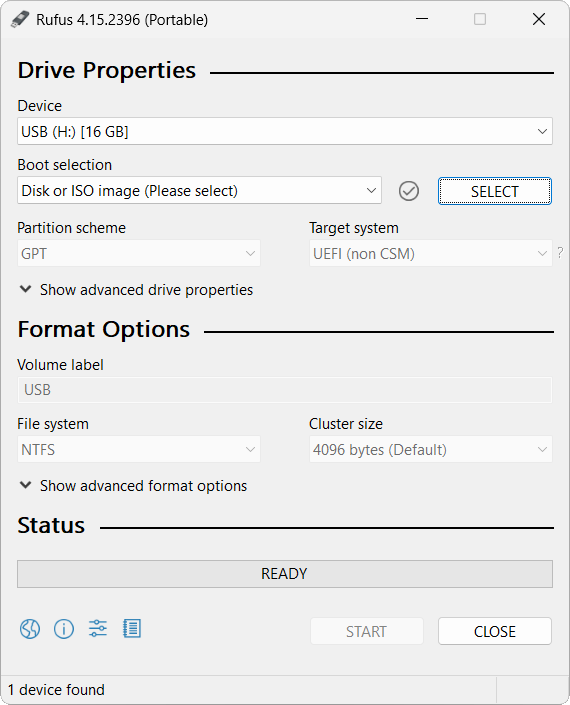
Under Device, select your USB drive. Check it twice: Rufus will erase whatever is selected.
Click SELECT and choose the Windows 11 ISO you downloaded in the previous chapter.
Leave every other setting alone — Rufus detects the correct parameters automatically (GPT and UEFI on a modern PC). The only thing worth changing is the Volume label: adding the year, for example 2026_Win11, tells you at a glance how old the drive is when you find it in a drawer two years from now.
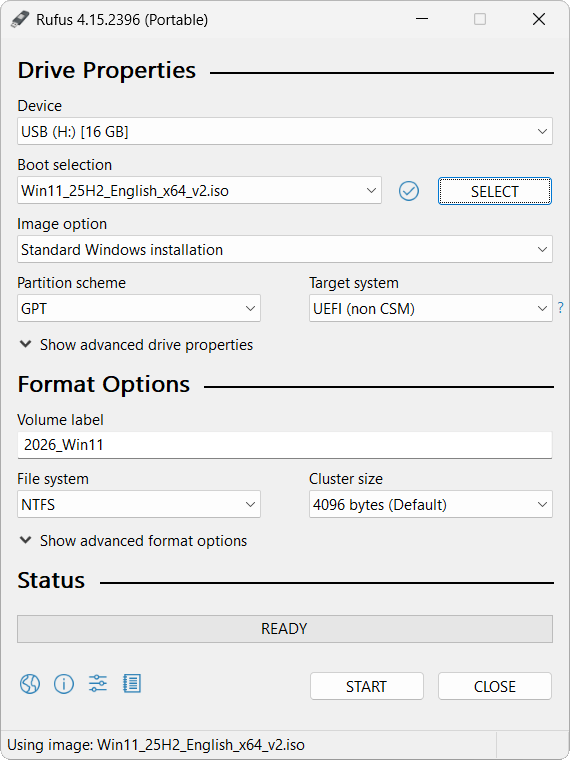
You should end up with this. Click START.
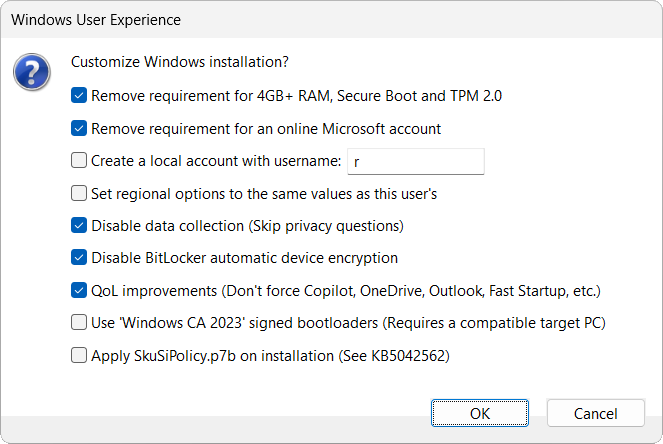
Rufus now offers to customize the installation. Here is what each option does:
- Remove requirement for 4GB+ RAM, Secure Boot and TPM 2.0 — bypasses the Windows 11 hardware requirements. Unnecessary on a modern PC, which already meets them. Only check this box if the installer refuses your machine.
- Remove requirement for an online Microsoft account — lets you create a local account. This is the option that makes the “I don't have Internet” choice appear later on.
- Disable data collection — answers the telemetry questions for you.
- Disable BitLocker automatic device encryption — recommended. Without it, Windows 11 silently encrypts your drive, and plenty of people end up locked out because they never noted down the recovery key.
- QoL improvements — avoids Copilot, OneDrive and Outlook being forced on you.
Make your choices, then click OK.
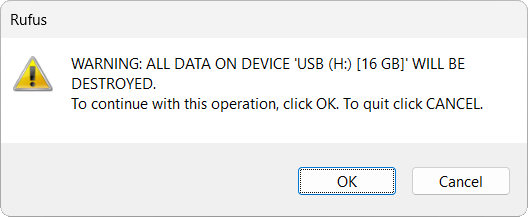
Rufus confirms one last time that everything on the drive will be destroyed. If you're sure, click OK.
The process takes 2 to 20 minutes depending on the drive and the port. Don't unplug the drive, don't close Rufus and don't shut down the PC while it runs, or you'll have to start over.
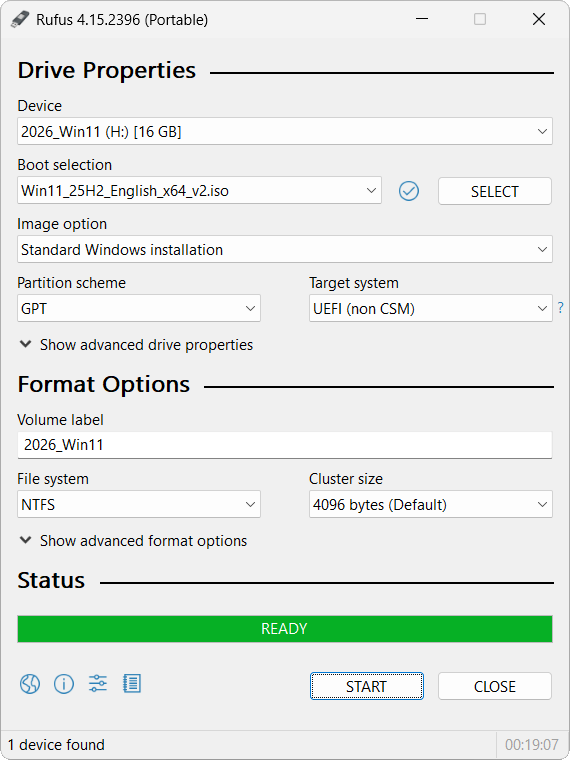
When the bar turns green and reads READY, the bootable drive is done. You can close Rufus.
Prepare the PC Folder on the Drive
This is the most useful chapter in the guide, and the one everyone skips. The idea is simple: put everything the machine will need onto the USB drive before it has any internet access.
A freshly installed Windows often has no network driver at all. With no working Wi-Fi or Ethernet, you can't download anything — including the driver you need. Preparing this folder now avoids that trap entirely.
Create the structure
On the USB drive, create a folder named PC containing three subfolders:
- drivers — every driver for your machine
- softs — your essential software, as .exe or .msi files
- opti — the optimization files (Chapter 6, optional)
If a driver comes as a .zip, extract it before copying it to the drive: you may not have an extraction tool available on first boot. 7-Zip handles this well.
7-Zip: https://www.7-zip.org/opens in a new tab
Finding the right drivers
The method depends on the type of machine, but the principle never changes: identify the exact model, then go to the manufacturer's support page.
Branded laptops and desktops (Dell, HP, Lenovo, Acer, ASUS, MSI…): the exact model is printed on a label underneath the machine or on the back of the case. Search for “<model> support drivers” and download from the manufacturer's own site. This is the best source, because the drivers there are matched to your specific machine.
Self-built or system-integrator PCs: the drivers come from the motherboard manufacturer, not from the store that sold it to you. To find the model, open PowerShell and run:
Get-CimInstance Win32_BaseBoard | Select-Object Manufacturer, ProductThen go to that manufacturer's site (ASUS, Gigabyte, MSI, ASRock, Biostar…), look up your model, and open the Support or Downloads section. Grab at least: chipset, network (LAN and Wi-Fi), audio, and USB if offered.
If you have no idea what's inside your PC, the spec sheet from your original order lists every component.
Graphics drivers
- NVIDIA: the NVIDIA App detects your card and installs the driver automatically, or download the driver on its own from the Drivers page.
- AMD: the AMD Auto-Detect and Install tool handles detection, or you can look up your model manually.
- Intel: the Intel Driver & Support Assistant detects your hardware automatically.
NVIDIA: https://www.nvidia.com/en-us/drivers/opens in a new tab
AMD: https://www.amd.com/en/support/download/drivers.htmlopens in a new tab
Intel: https://www.intel.com/content/www/us/en/download-center/home.htmlopens in a new tab
On a laptop, take the graphics driver from the laptop manufacturer's site instead. GPU power management is tuned to the chassis, and while generic drivers work, they sometimes behave worse on battery.
The softs folder
At minimum, put your preferred browser here (Brave, Firefox, Chrome…) as an .exe or .msi. It's the first thing you'll install after the drivers.
The opti folder (optional, see Chapter 6)
If you plan to do the optimization in Chapter 6, download the ReviOS playbook (.apbx) and AME Wizard (.exe) now, from the official releases pages:
ReviOS: https://github.com/meetrevision/playbook/releases/latestopens in a new tab
AME Wizard: https://github.com/Ameliorated-LLC/trusted-uninstaller-cli/releases/latestopens in a new tab
What about the BIOS?
Updating the motherboard BIOS before installing Windows is good practice, especially on a recent machine. It isn't mandatory and can be done afterwards. A dedicated guide will follow.
Once everything is copied into the right subfolders, you're ready to install Windows.
Install Windows 11
The screenshots in this chapter come from a virtual machine, which produces clean, readable images. The screens are identical on physical hardware.
Before you boot
Unplug the Ethernet cable if there is one, and don't connect to Wi-Fi. This is what will let you create a local account instead of being forced to sign in with a Microsoft account.
Plug the USB drive into the fastest port on the machine — the installation will be noticeably quicker.
Booting from the USB drive
As the PC starts, press the boot menu key repeatedly as soon as the manufacturer's logo appears. The most common ones:
- F12 — Dell, Lenovo, Acer, Gigabyte
- F11 — MSI, ASRock
- Esc — HP laptops (then F9) and ASUS laptops
- F8 — ASUS and ROG motherboards
- Surface — hold Volume Down and press the power button
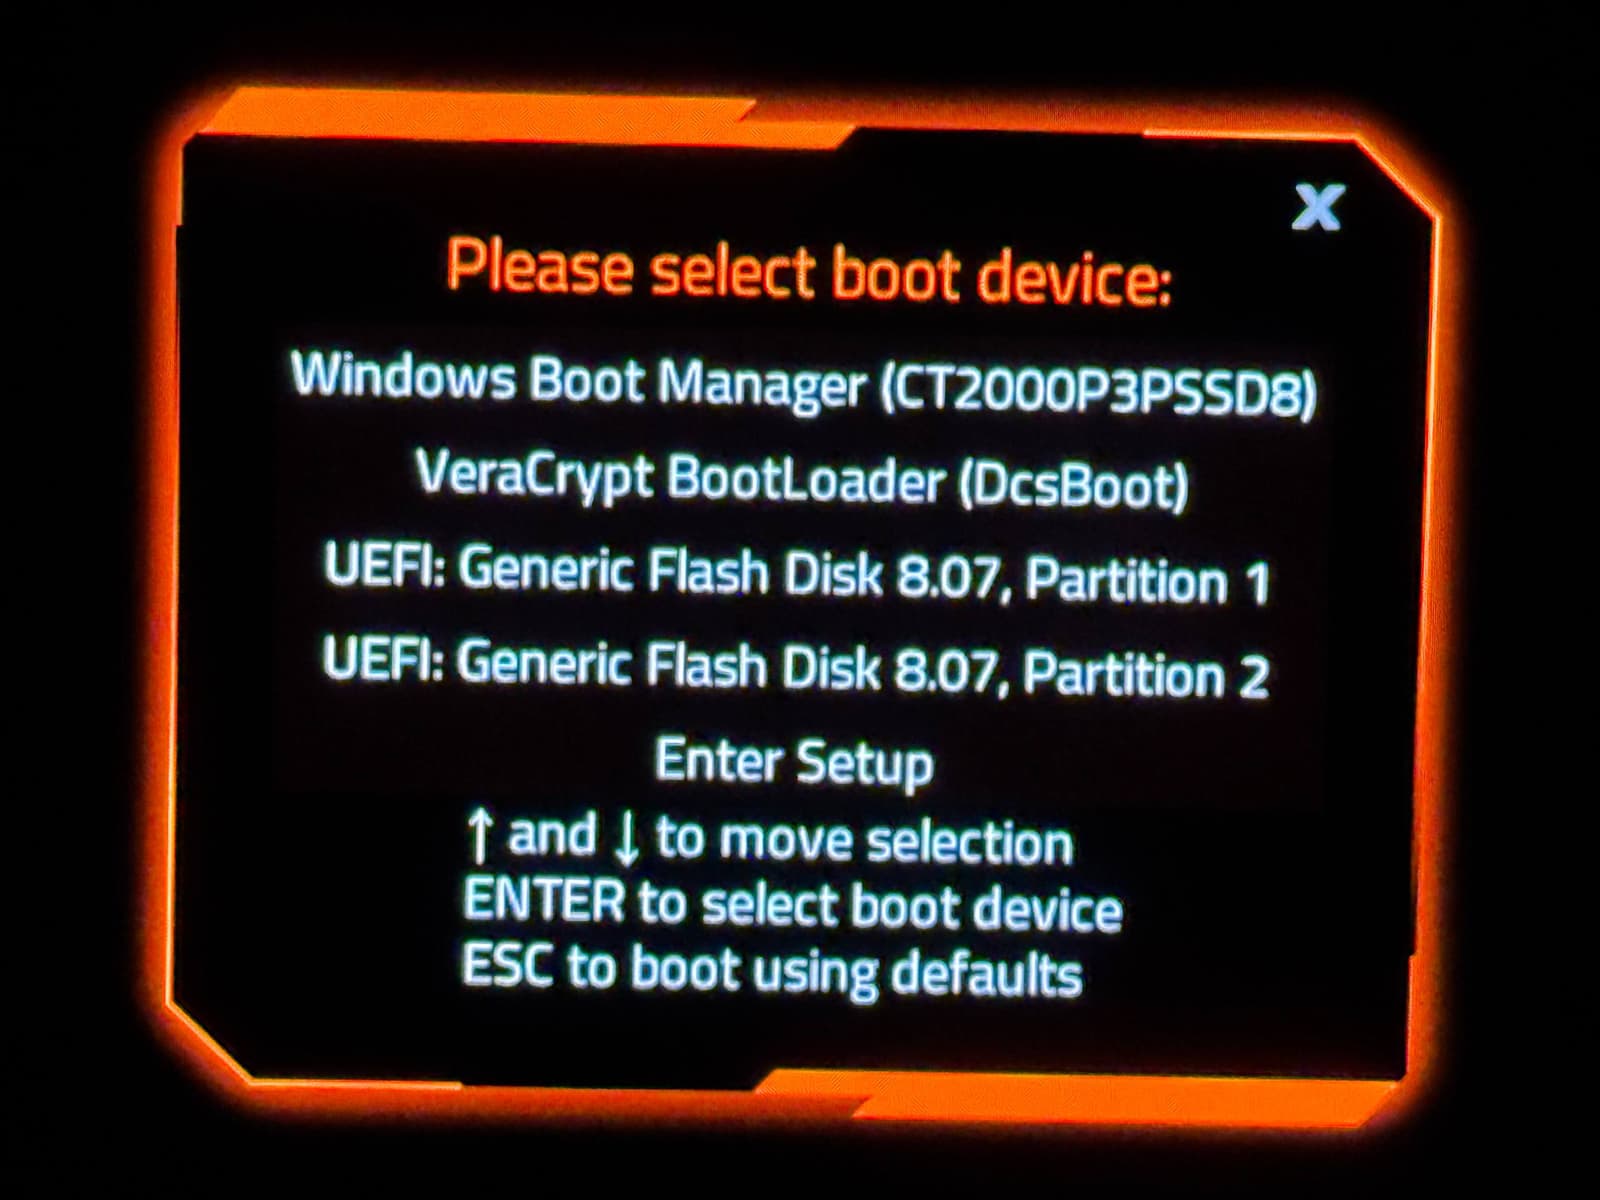
Here is what a boot menu looks like on a Gigabyte board. Every machine lists something different — yours will show your own drives — so pick by name, not by position. Your USB drive is usually the entry starting with UEFI.
The Windows logo appears, followed by a loading screen.
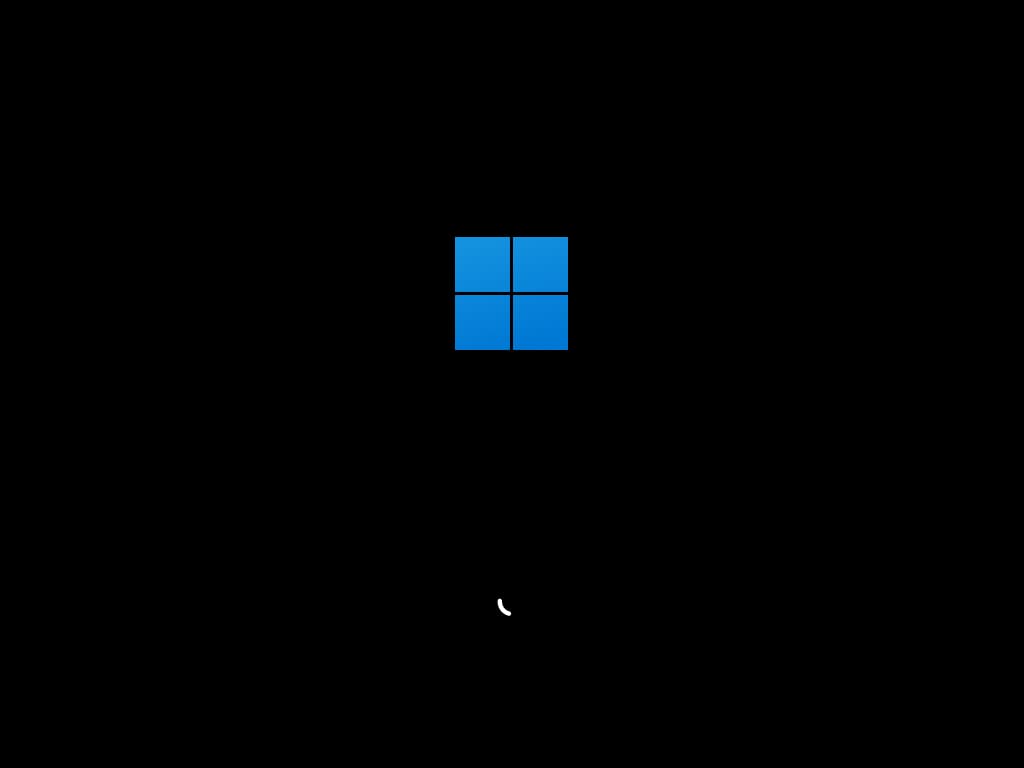
The installer starts.
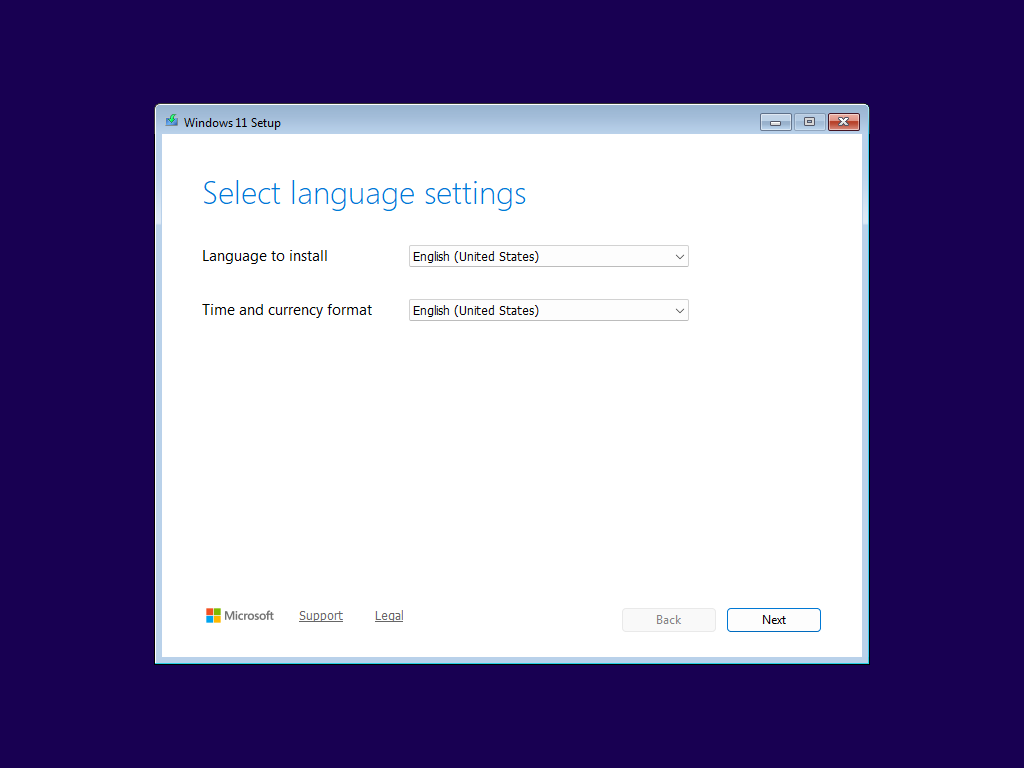
Pick your language — it should already be correct, since you downloaded the matching ISO — and your country.
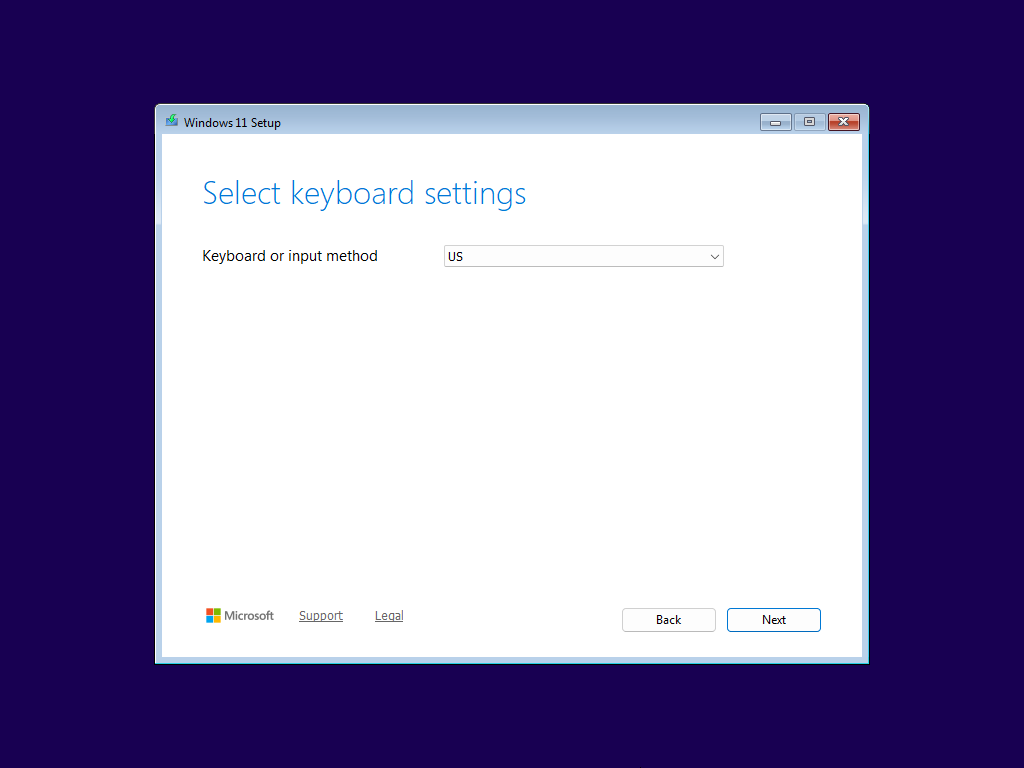
Select your keyboard layout. Note that this is separate from the display language: your physical keyboard may not match the language you chose. Click Next.
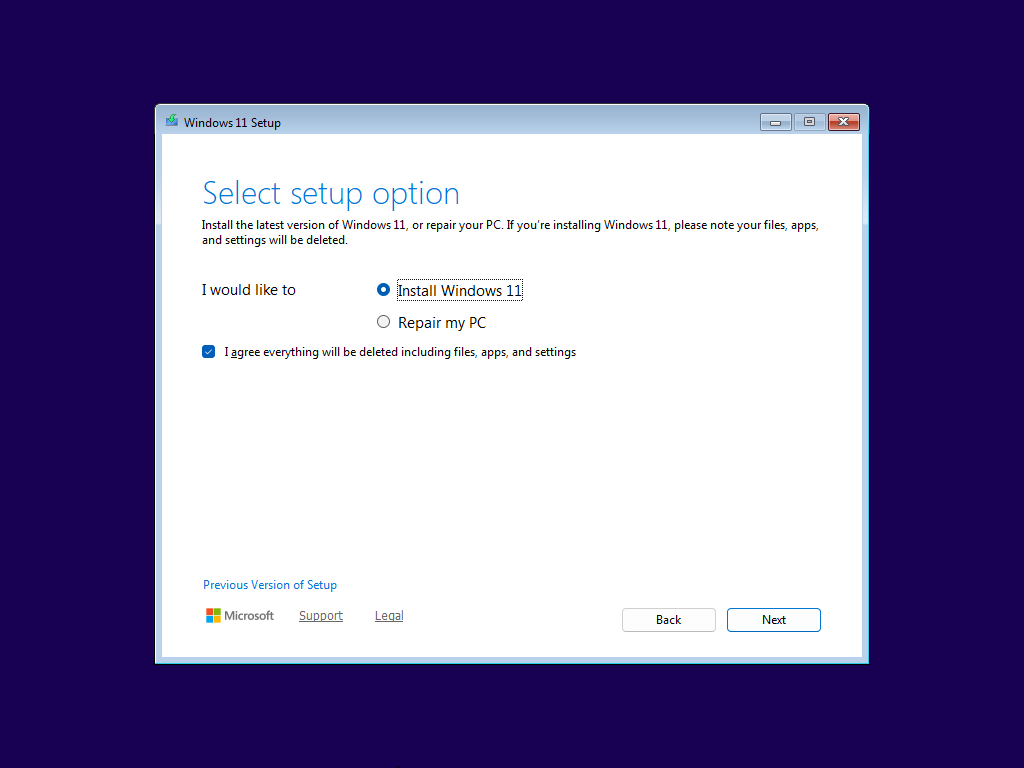
Select “Install Windows 11” and check the confirmation box. That box is telling you that everything will be deleted: files, apps and settings. Click Next.
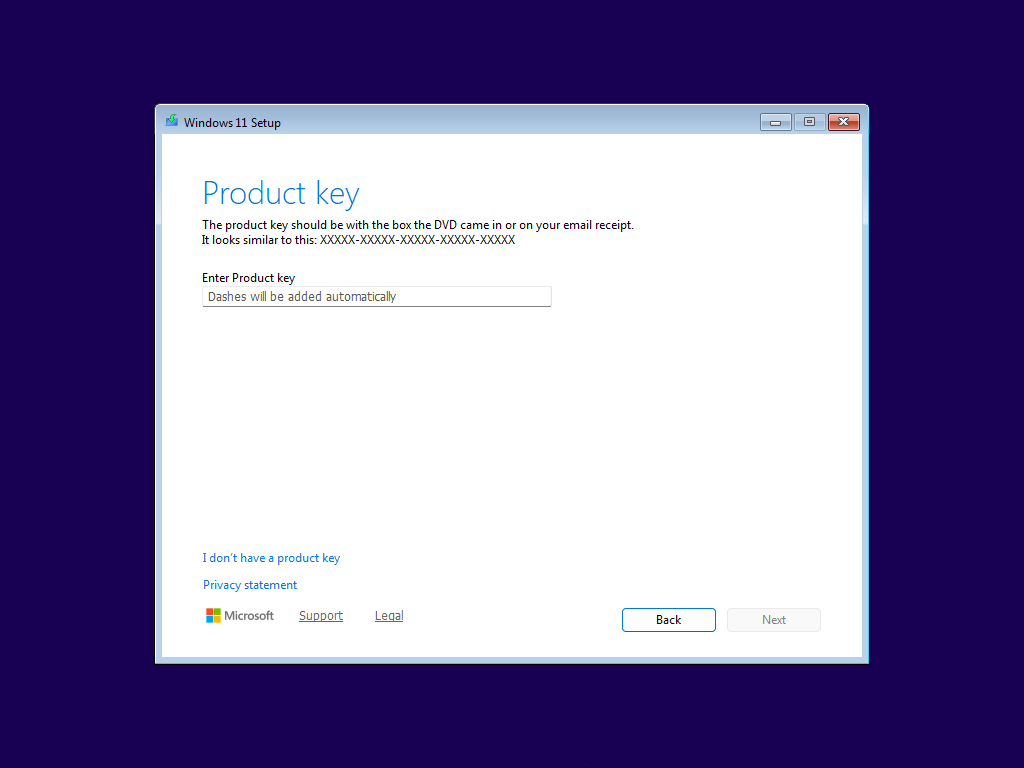
Click the “I don't have a product key” text. We'll deal with activation at the end of this chapter.
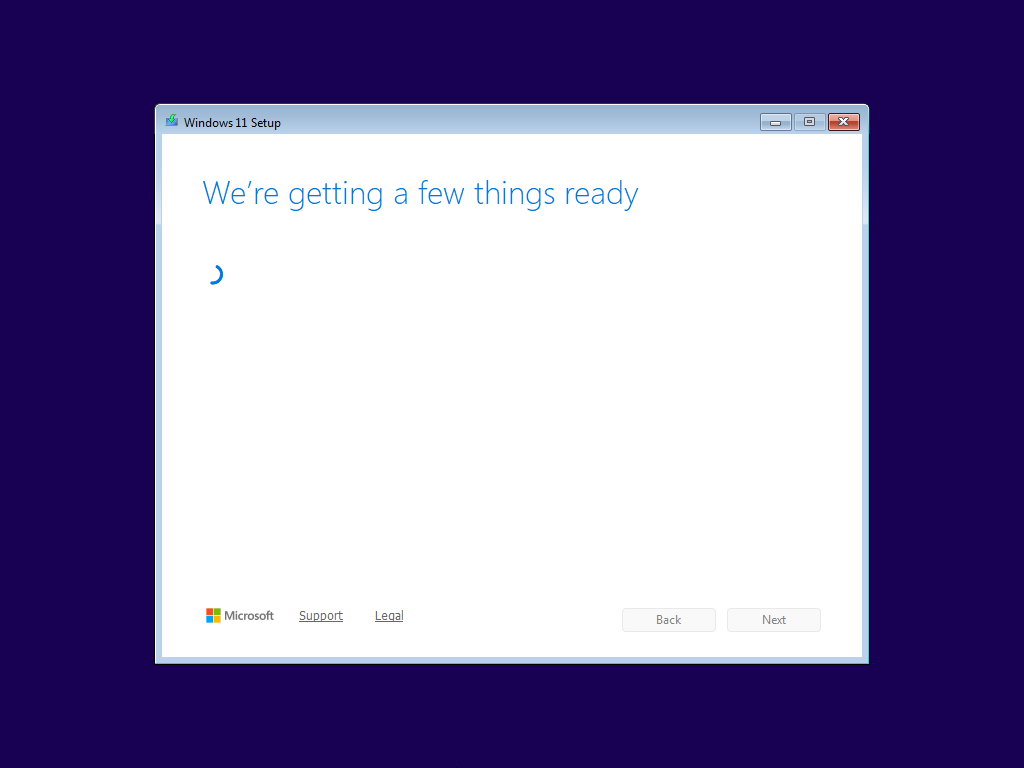
A short loading screen, then the edition selection.
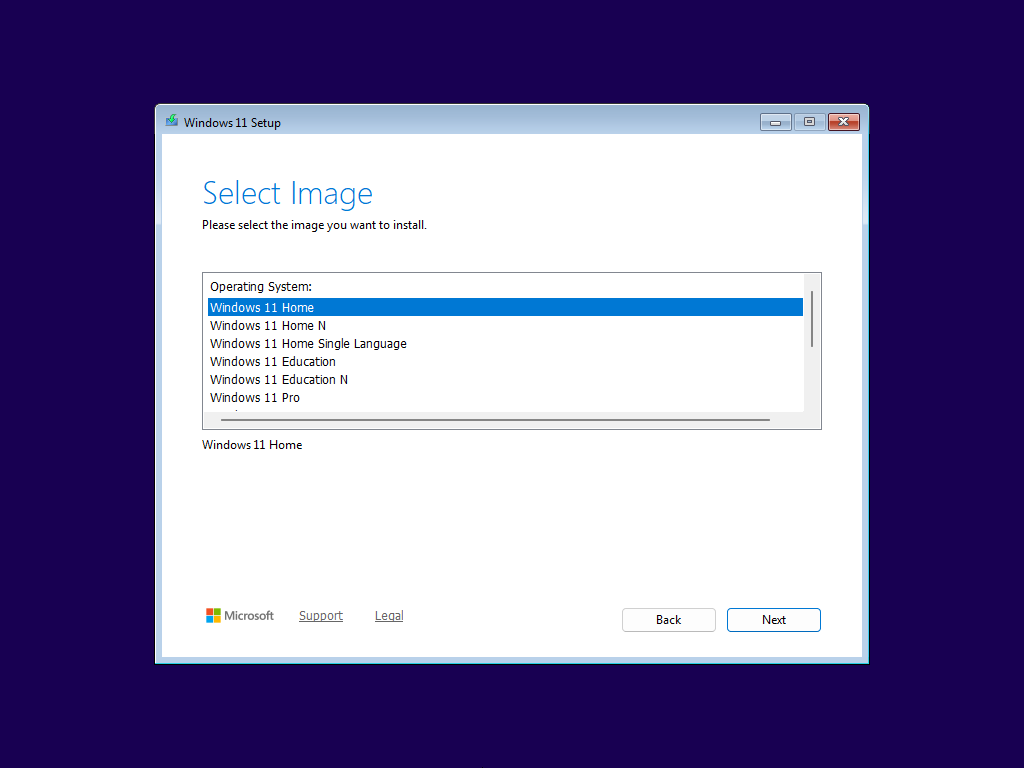
Choosing the edition
Windows 11 Home is more than enough for everyday use: office work, browsing, gaming.
Windows 11 Pro adds BitLocker (full-disk encryption), Remote Desktop, Group Policy access and domain join. It's the right choice for professional use.
The part that matters: pick the edition that matches your license. Installing Pro with a Home key will work, but Windows will never activate.
Ignore the editions marked N. These ship without Windows Media Player and certain codecs, a legacy of European market rules. They offer no advantage and cause problems with some software.
If you don't have a license, you can buy one directly from Microsoft:
Windows 11 Home: https://www.microsoft.com/en-us/d/windows-11-home/dg7gmgf0krt0opens in a new tab
Windows 11 Pro: https://www.microsoft.com/en-us/d/windows-11-pro/dg7gmgf0d8h4opens in a new tab
Click Next.
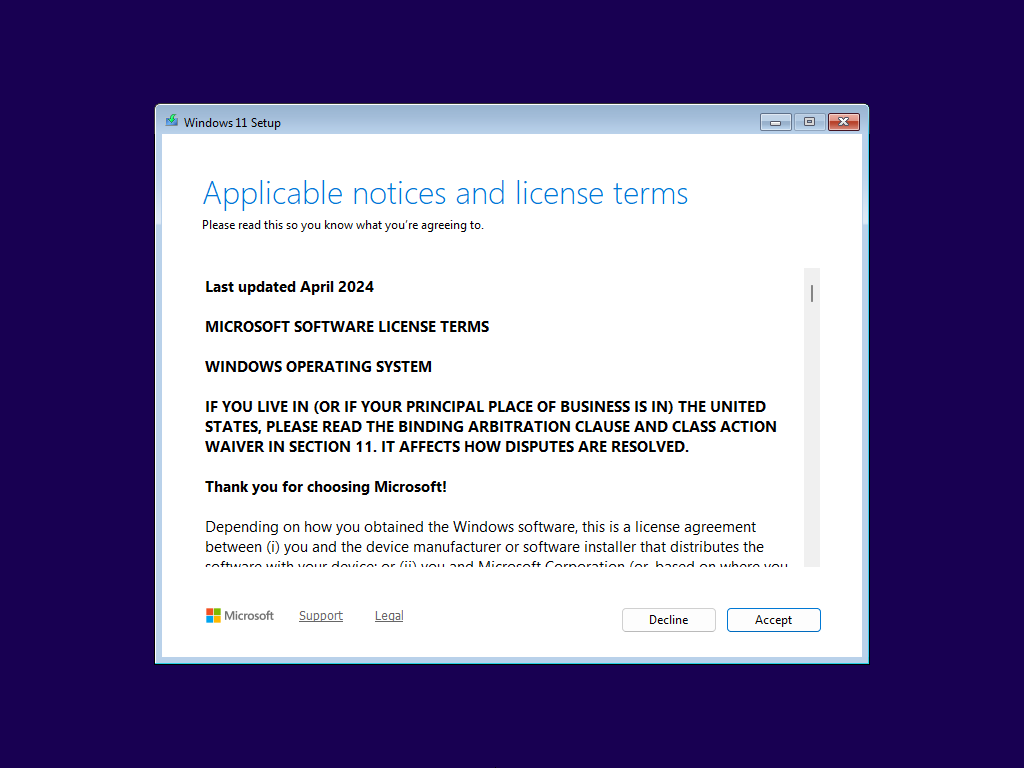
Accept the Microsoft license agreement by clicking Accept. Decline simply takes you back a step — there is no way to install Windows without accepting these terms.
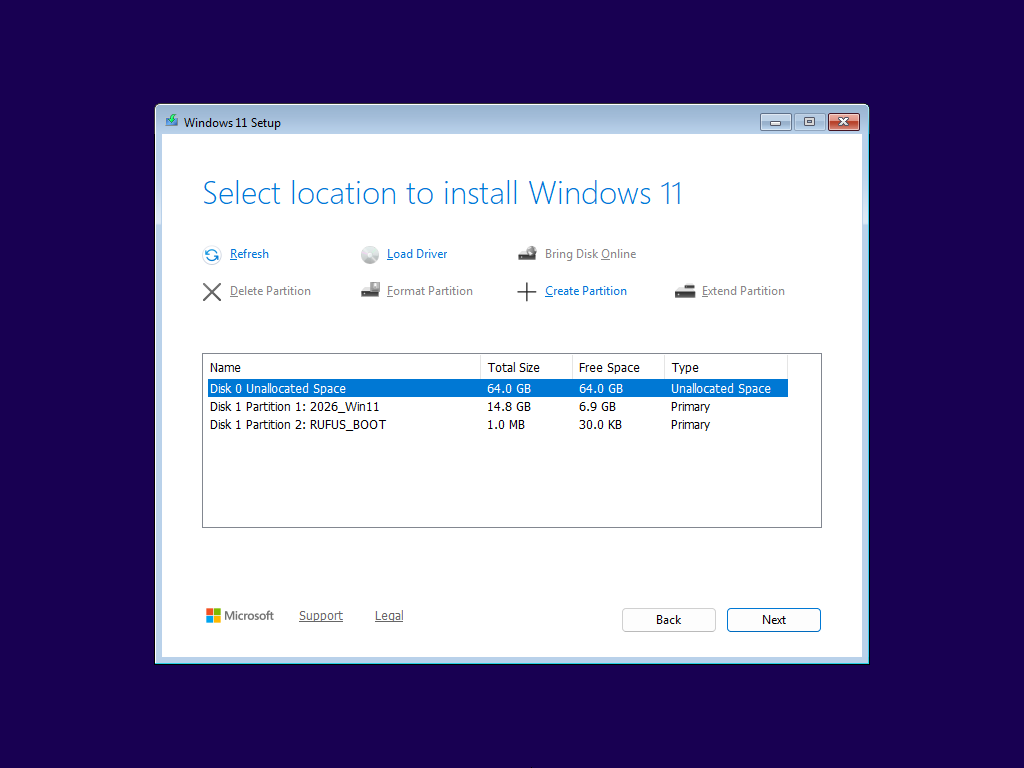
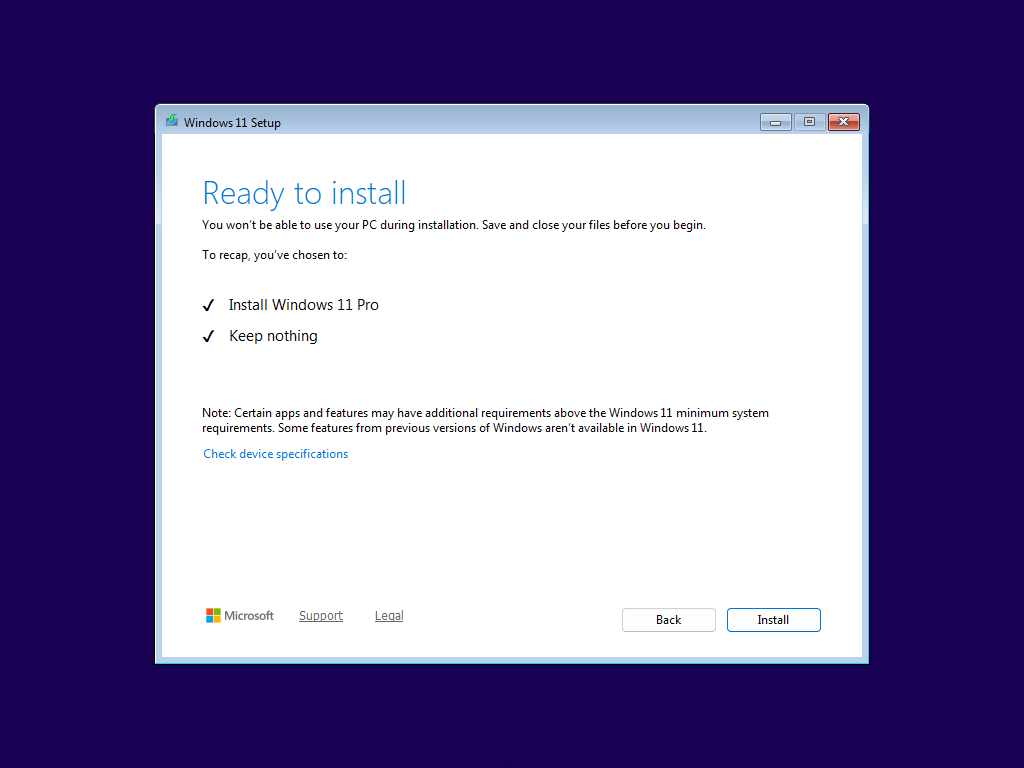
Check the summary one last time, then click Install.
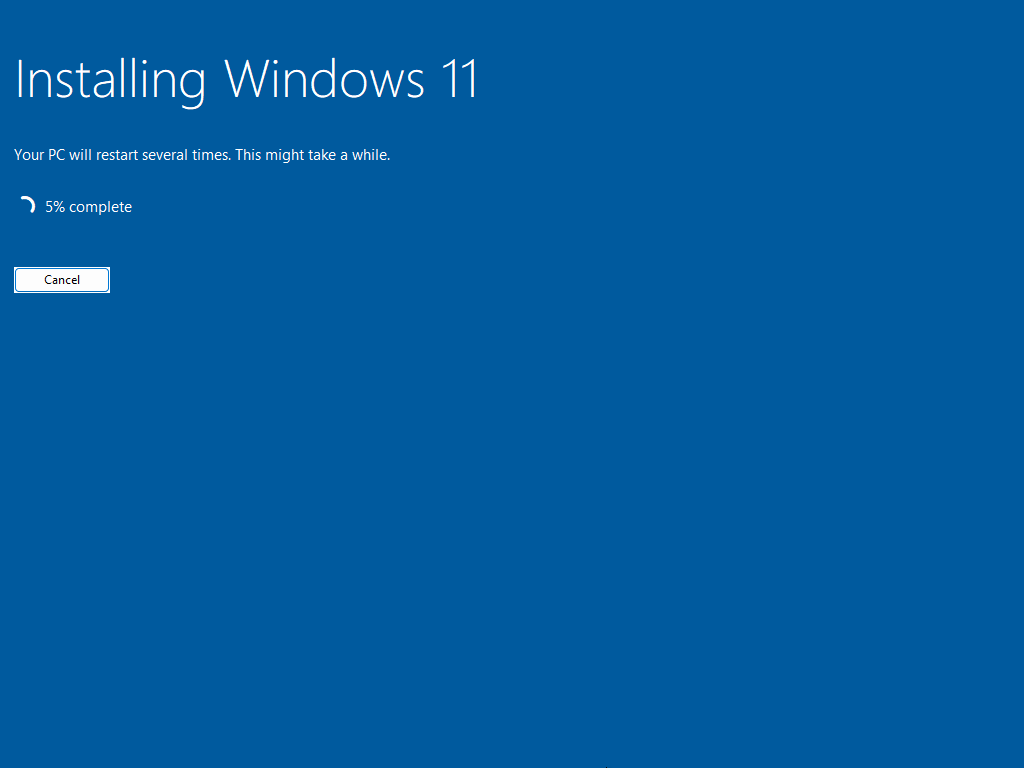
The installation begins. Expect 5 to 20 minutes depending on the drive and port. There's nothing left to do: go grab a coffee.
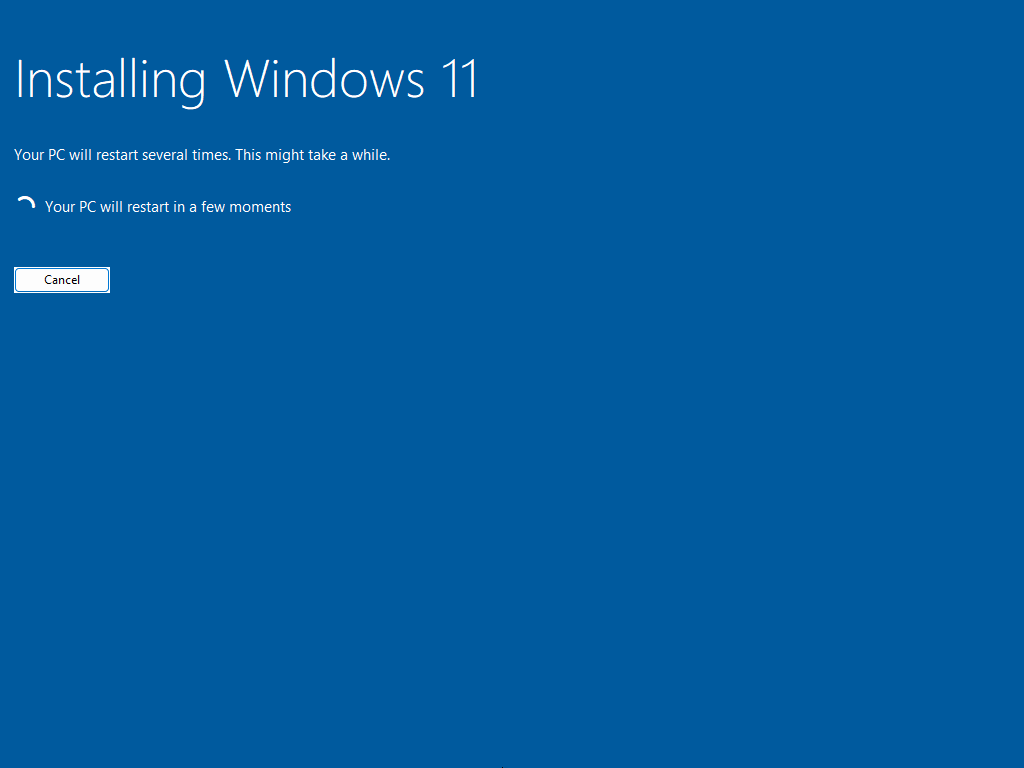
The PC restarts.
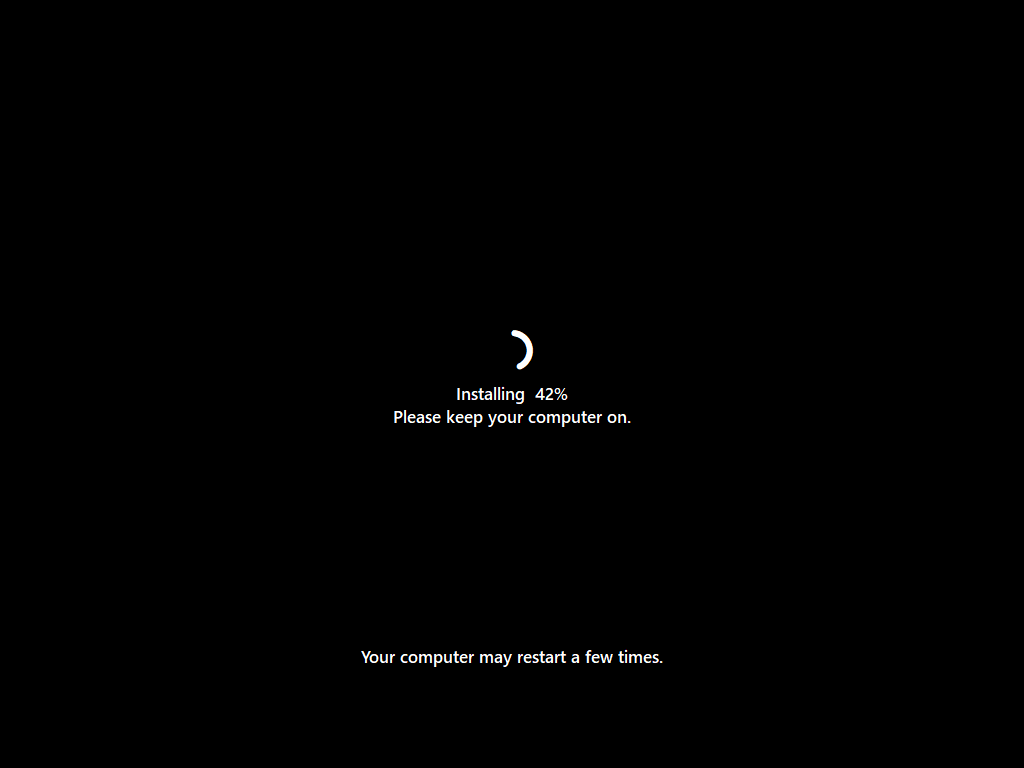
Windows continues installing. Do not power the machine off: it will restart several times, which is normal and fully automatic.
First-run setup
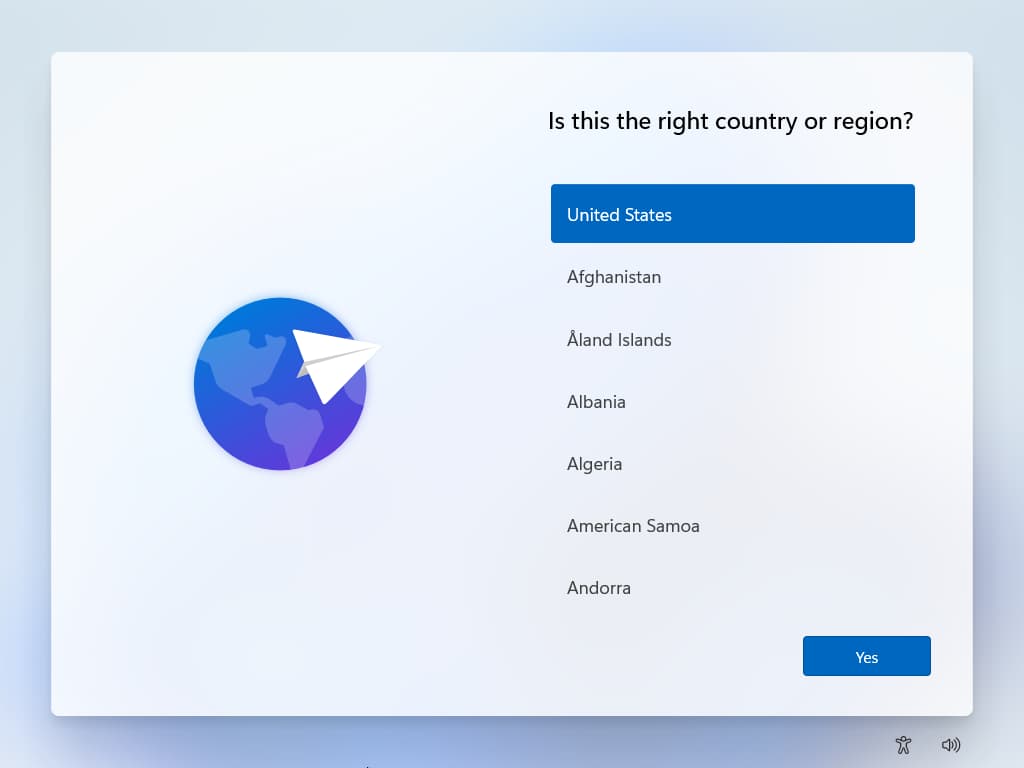
The first screen asks you to confirm your country. This isn't cosmetic: it sets the date and time format, the currency, your Microsoft Store region, and which features are available. Give your actual country of residence, even if you're installing Windows in English. Click Yes.
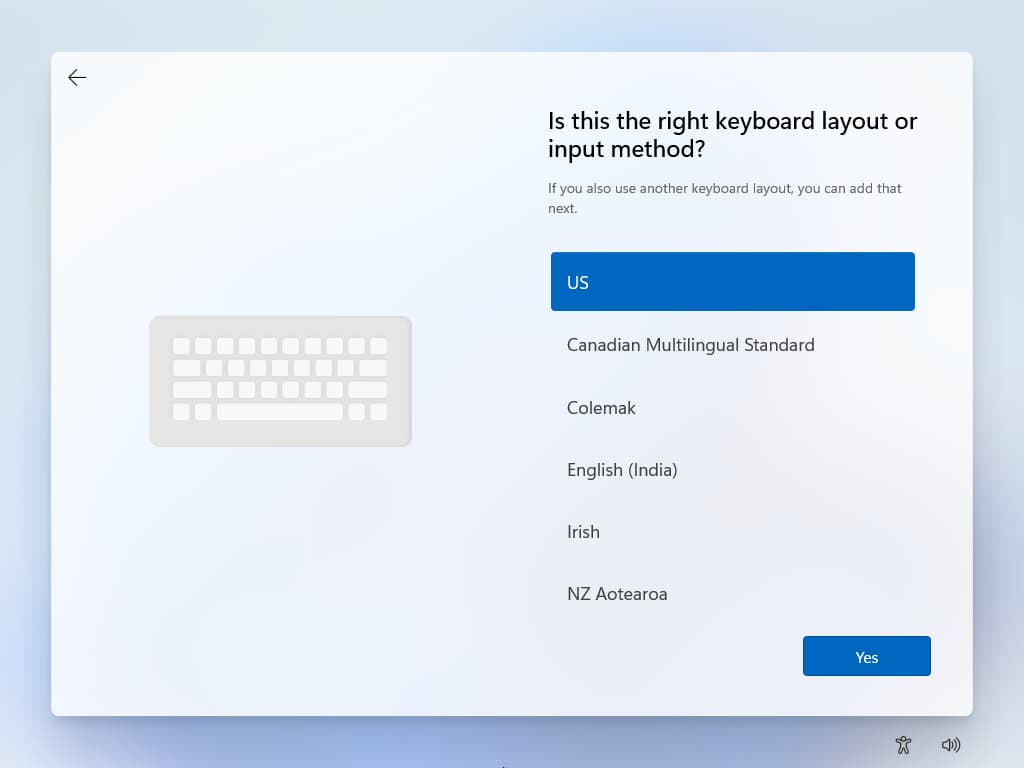
Confirm the keyboard layout, then Yes. Windows then offers to add a second layout: add it if you need one, otherwise click Skip.
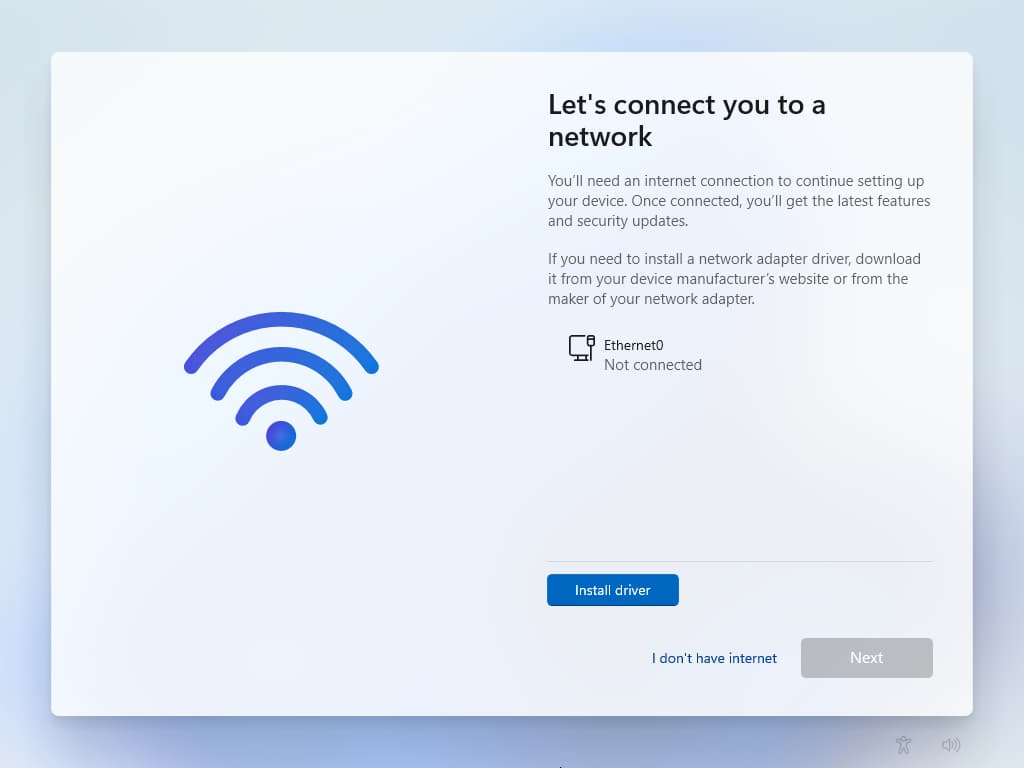
Windows asks you to connect to the internet. Click “I don't have Internet”.
If that option isn't there, the “Remove requirement for an online Microsoft account” box wasn't checked in Rufus back in Chapter 3. Also check that no Ethernet cable is plugged in.
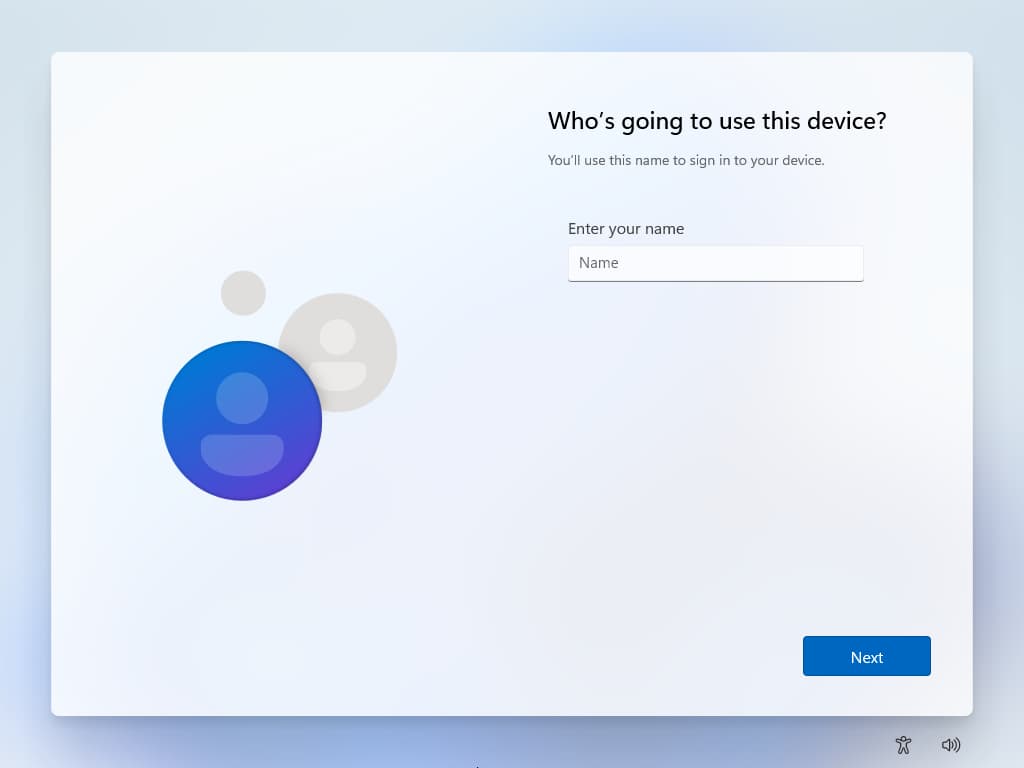
Choose your local user name, then Next.
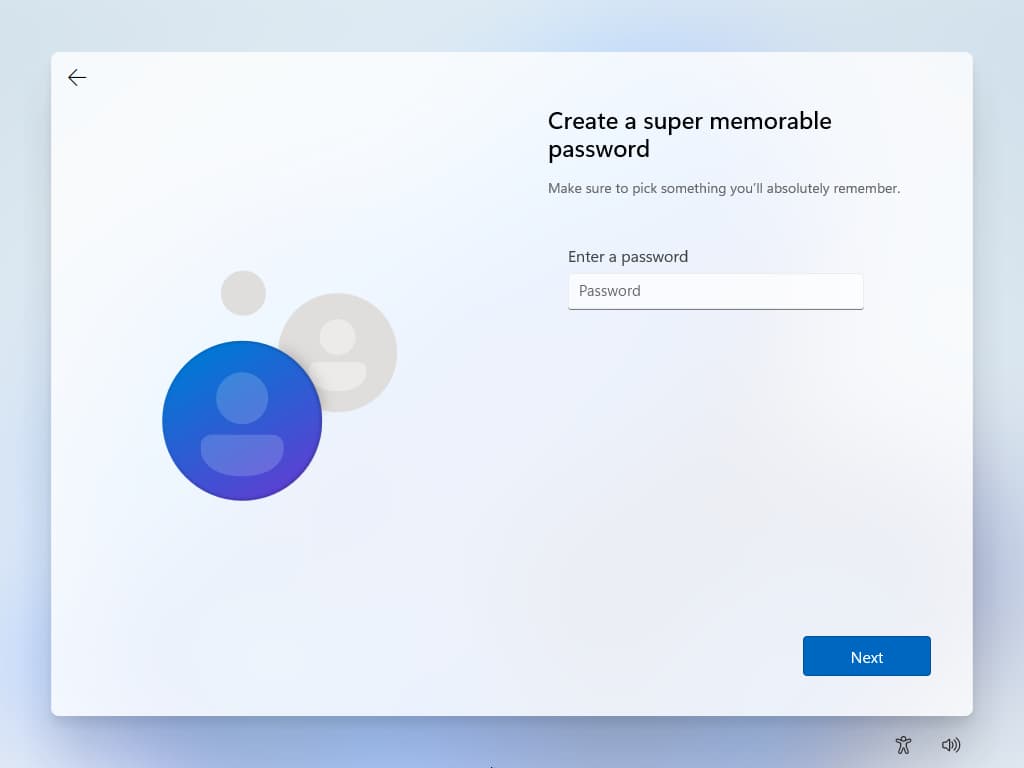
Setting a password
Windows now asks for a password. A few pointers:
- Aim for at least 12 characters. A passphrase made of three or four unrelated words is both stronger and easier to remember than a short password stuffed with symbols.
- Don't reuse a password from anywhere else, especially not your email account.
- Record it in a password manager, or on paper somewhere safe.
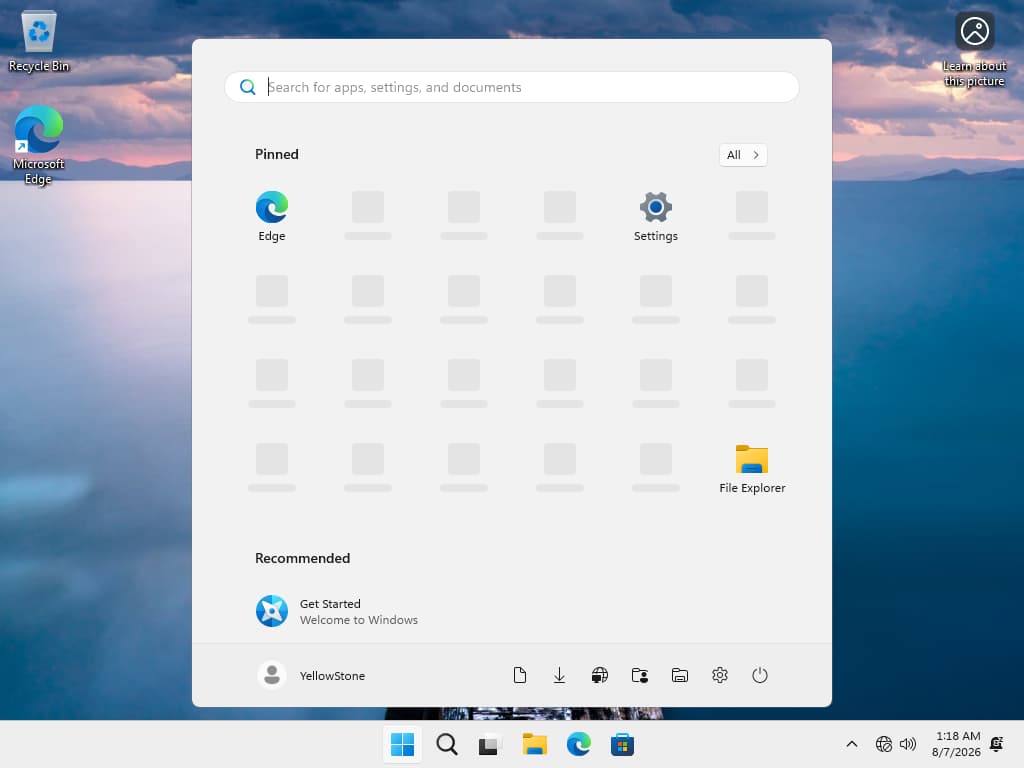
First steps on the desktop
You arrive at the desktop. As the screenshot shows, there's still no internet connection, since we deliberately kept it away.
Restore it now: either plug the Ethernet cable back in, or install the Wi-Fi driver from your PC folder first.
Copy the PC folder from the USB drive to the desktop, then:
- Install every driver from the drivers folder. Restart whenever a driver asks for it, then carry on where you left off until they're all done.
- Check your work: right-click the Start button, then Device Manager. There should be no yellow exclamation marks and no “unknown device” left.
- Install your browser from the softs folder.
If you didn't prepare anything, all of this can still be downloaded through Edge once you're online — assuming you have a connection, which is exactly what isn't guaranteed without a network driver.
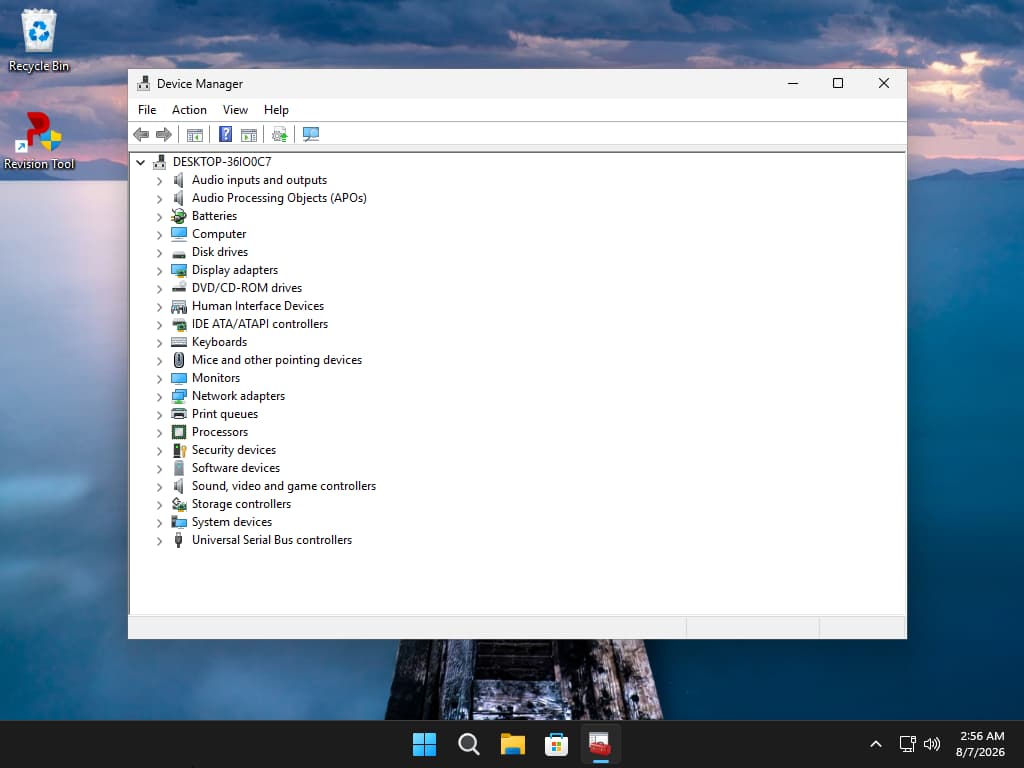
This is what you are aiming for: every category listed normally, no yellow exclamation marks, and no “Other devices” section. Every piece of hardware has found its driver.
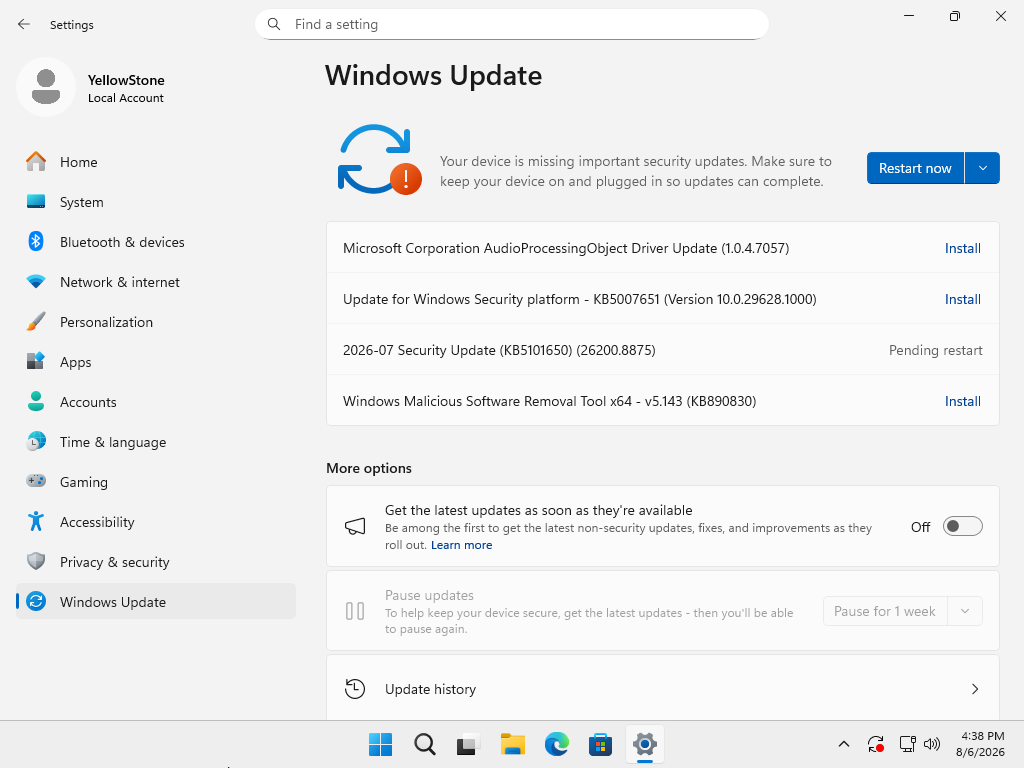
Windows Update
With the drivers and your browser installed, open Settings, go to Windows Update, and install every update until none are left. This usually takes several rounds.
Never power the PC off while updates are installing, including during restarts — it can corrupt the system.
If Windows Update offers Preview Updates, don't install them. They're test builds and can introduce bugs.
Activating Windows
Now is the time to deal with the activation we postponed. Open Settings > System > Activation.
- If your license was embedded in the firmware, Windows is already activated and will say “Windows is activated”. Nothing to do.
- Otherwise, click Change product key and enter your 25-character key.
- If your license is tied to a Microsoft account, sign in with it: activation happens automatically once the hardware is recognized.
An unactivated Windows still works, but shows a watermark and blocks personalization — wallpaper, colors and themes.
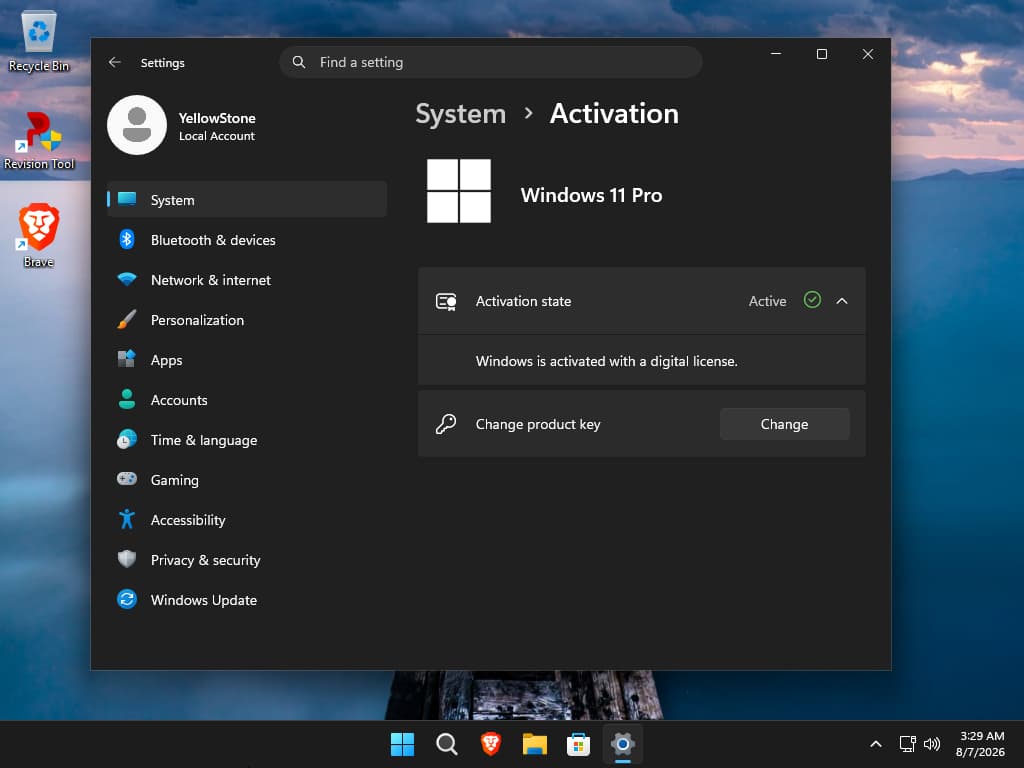
“Windows is activated with a digital license” means the license is tied to this hardware. Any future reinstall on the same machine activates on its own, with no key to type in.
Optimization with ReviOS
Optional
This chapter is entirely optional. Your PC is already fully working at this point — you can stop at Chapter 7 without missing anything.
ReviOS is an open-source playbook that removes preinstalled bloatware and adjusts a large number of Windows settings for performance and privacy. It is applied through AME Wizard.
ReviOS (the .apbx): https://github.com/meetrevision/playbook/releases/latestopens in a new tab
AME Wizard (the .exe): https://github.com/Ameliorated-LLC/trusted-uninstaller-cli/releases/latestopens in a new tab
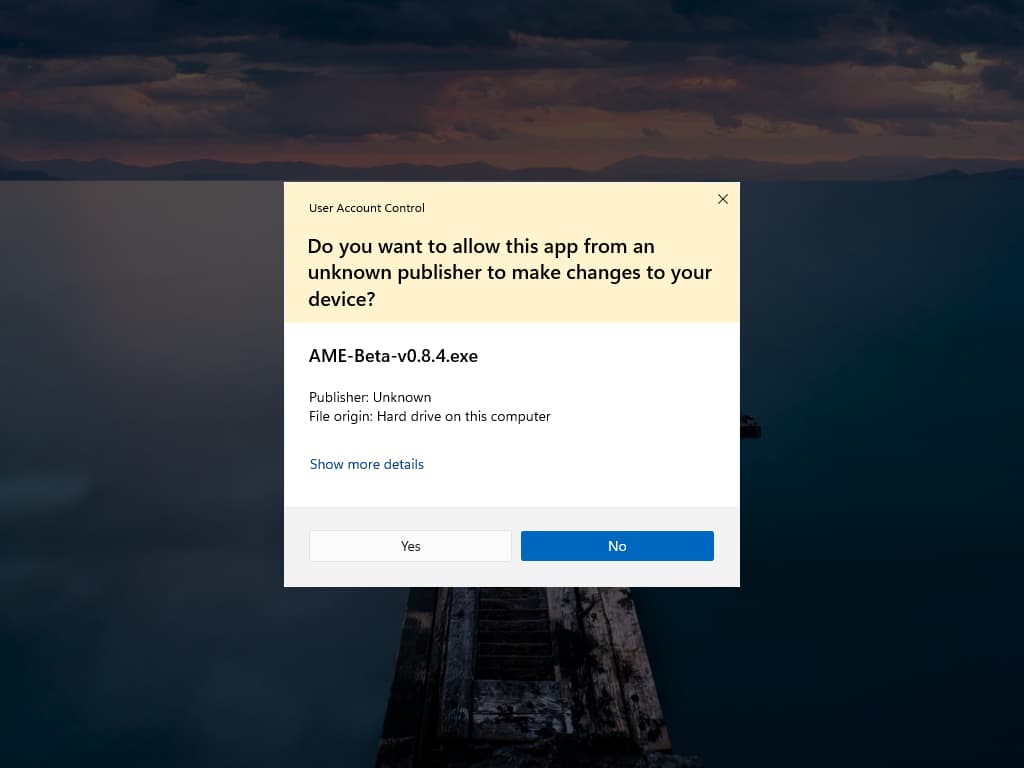
When you launch AME Wizard, Windows asks for permission: click Yes. You can close the File Explorer window in the background.
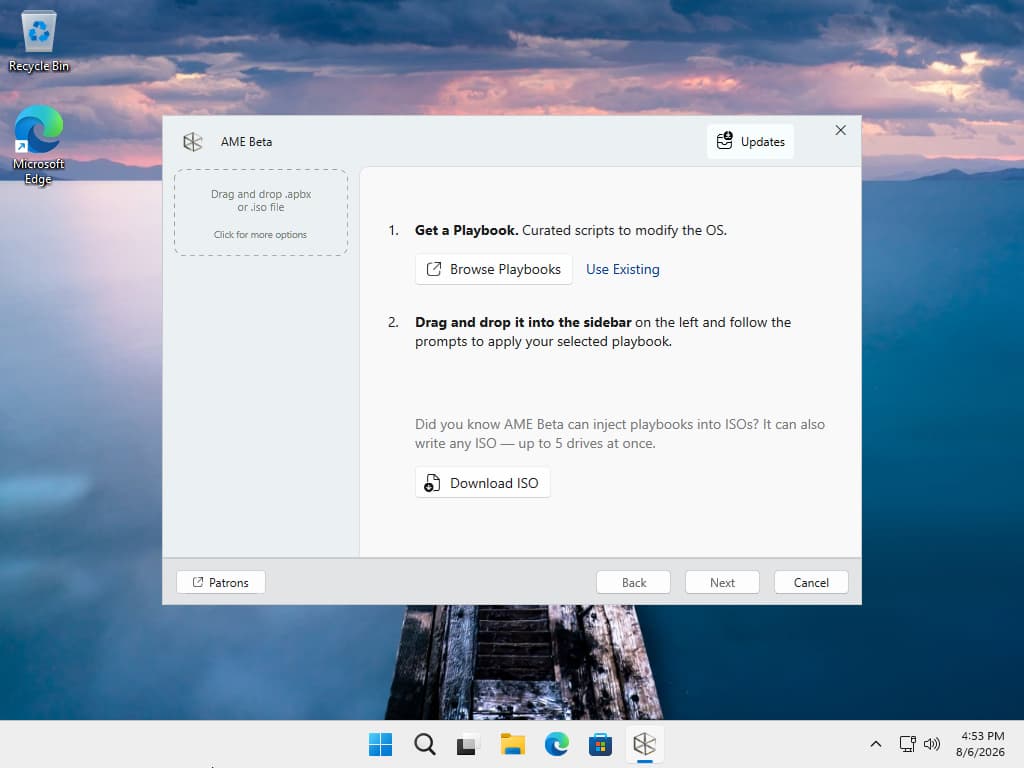
Click “Use Existing”.
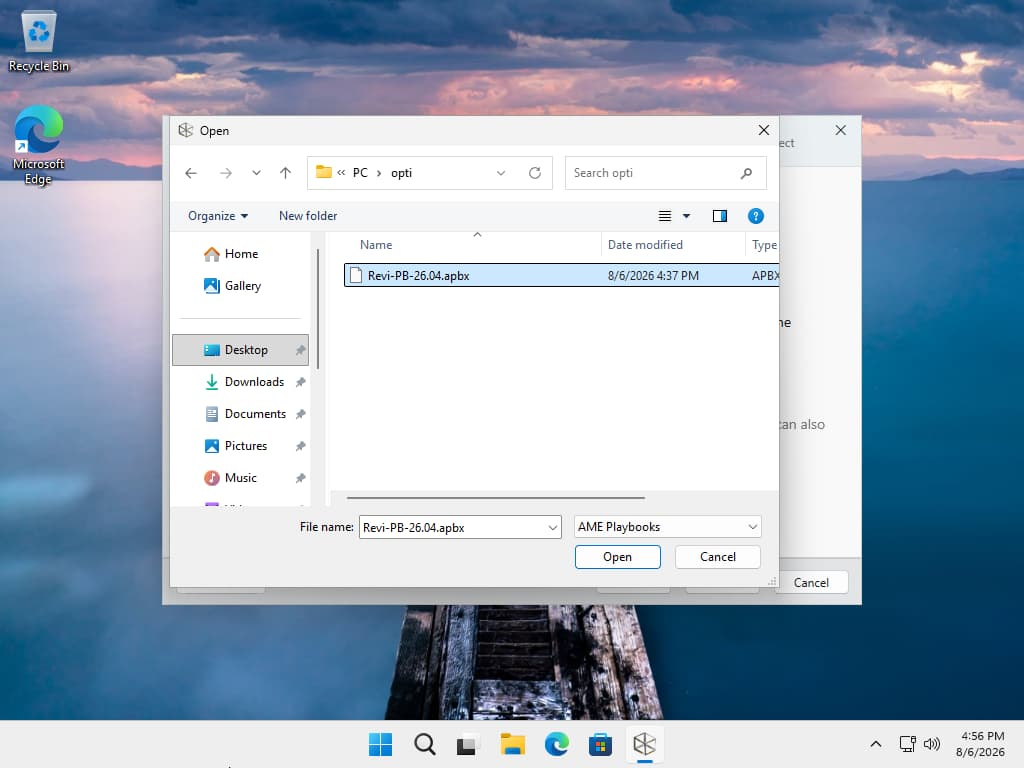
Select the ReviOS .apbx file, then Open.
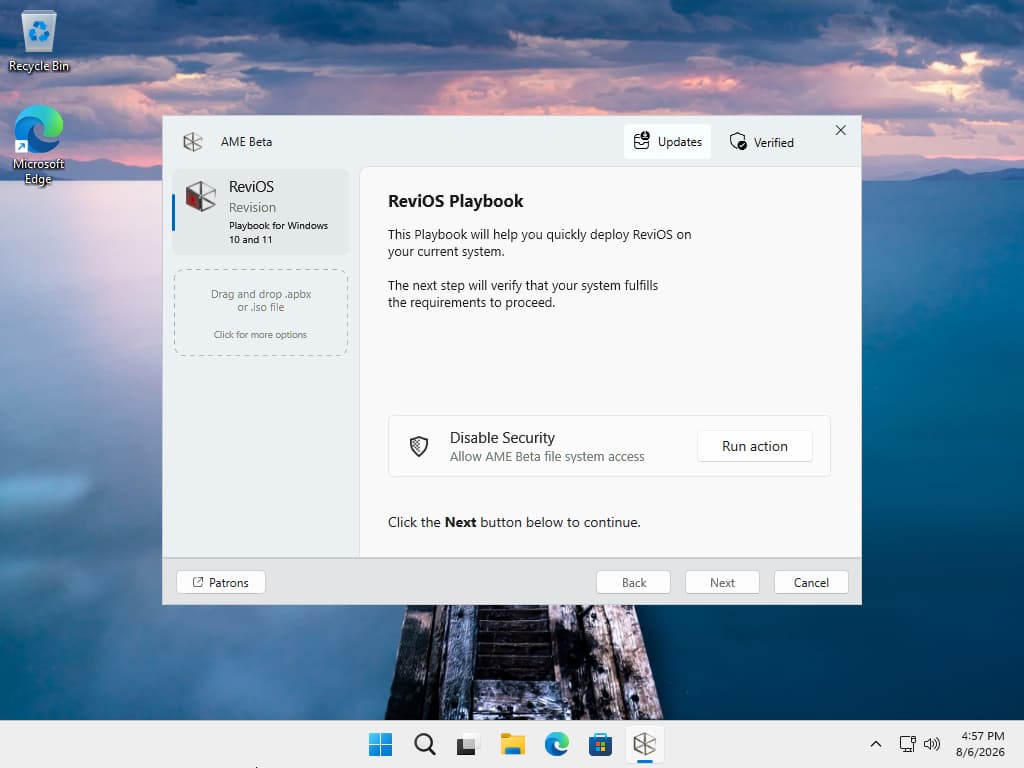
ReviOS appears in the left column. In the center, the wizard asks you to disable security: click “Run Action”.
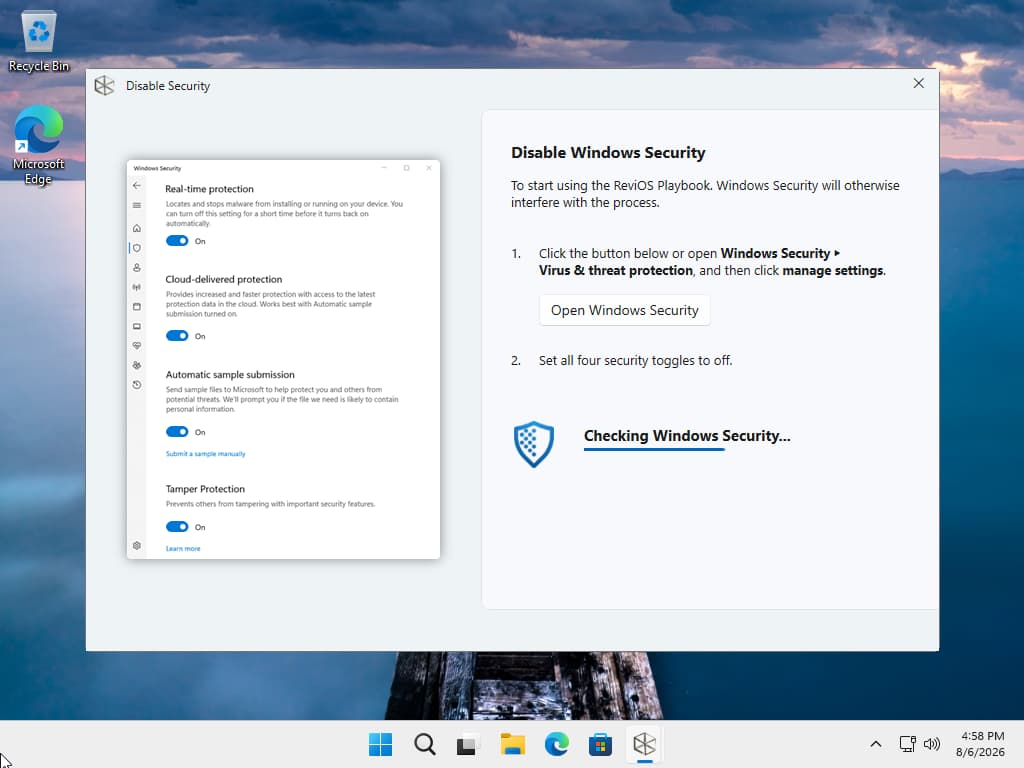
Click “Open Windows Security”.
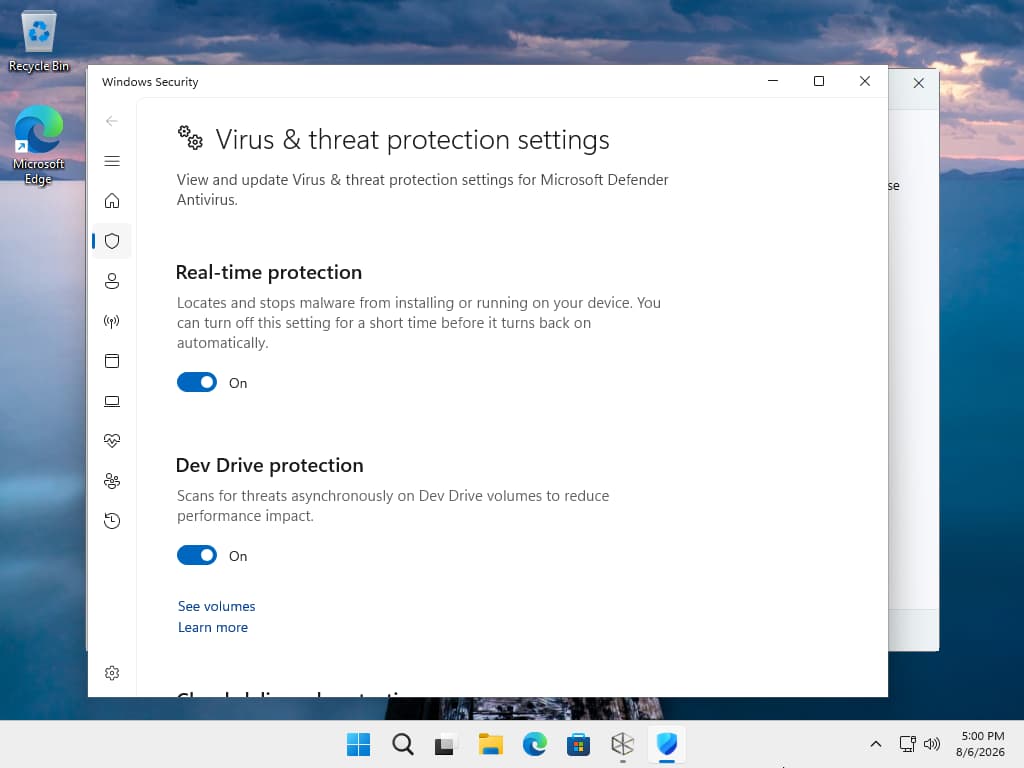
Windows Defender opens. Turn off: Real-time protection, Dev Drive protection, Cloud-delivered protection, Automatic sample submission and Tamper Protection.
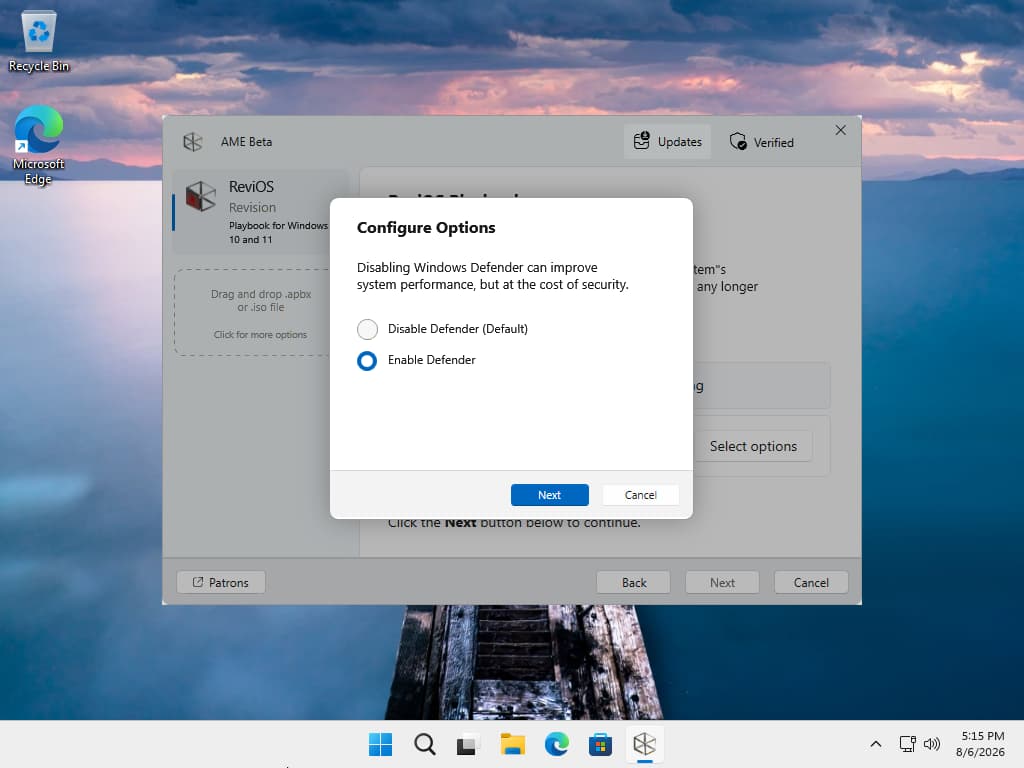
These protections come back at the end of the process, as long as you keep Defender enabled at the options step — which this guide recommends.
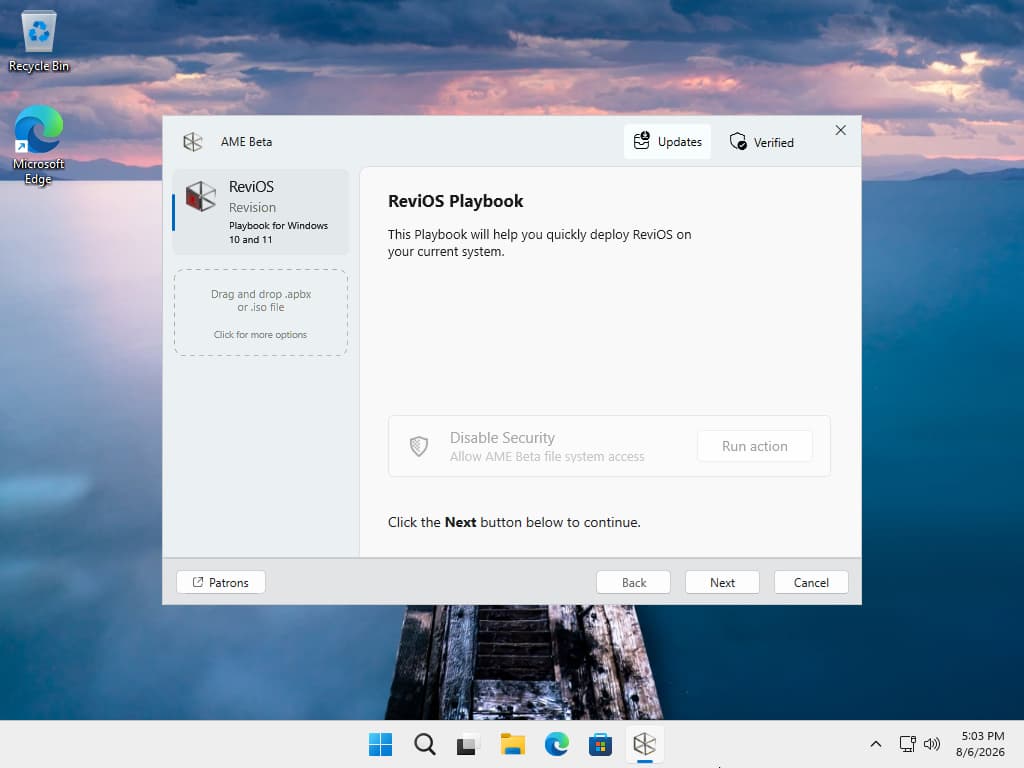
Once everything is off, the Windows Defender window closes on its own. Close the “Disable Security” window too to return to AME Wizard, then click Next.
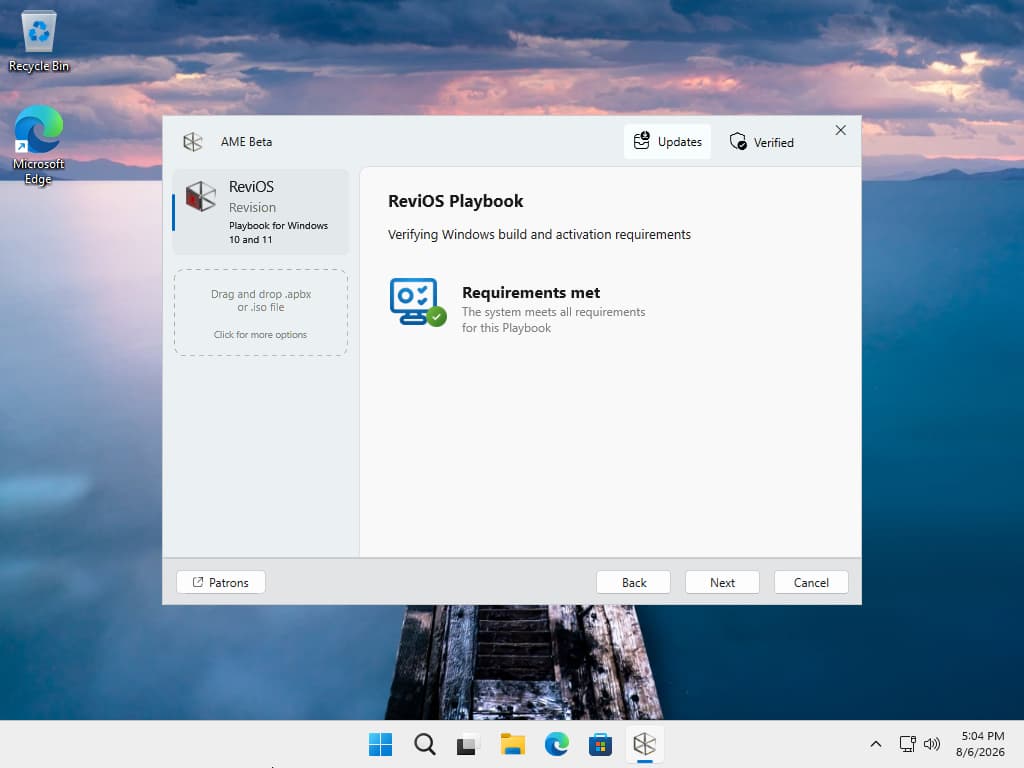
Click Next.
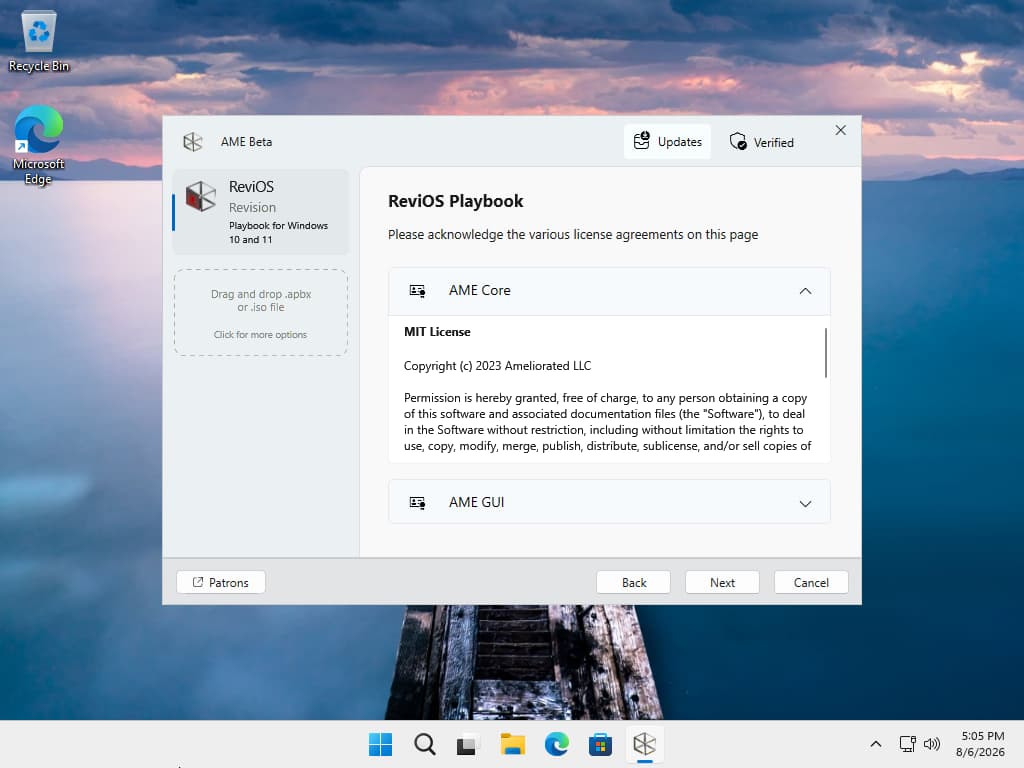
Next, then Agree in the blue window that appears above AME Wizard.
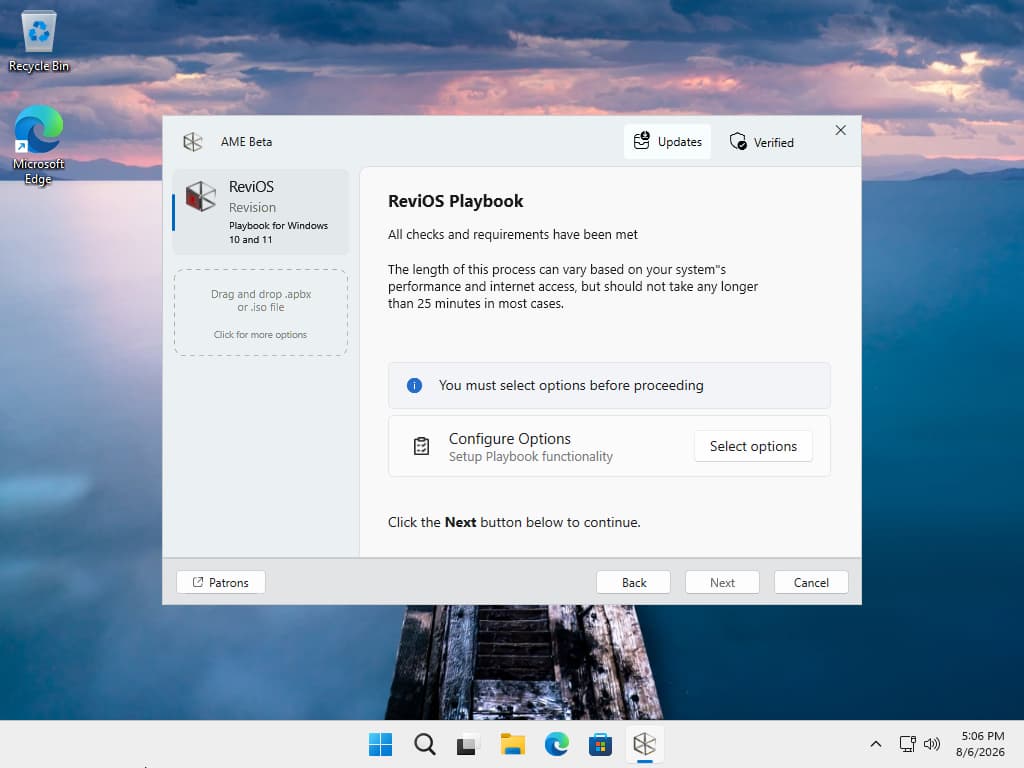
Click “Select Options”.
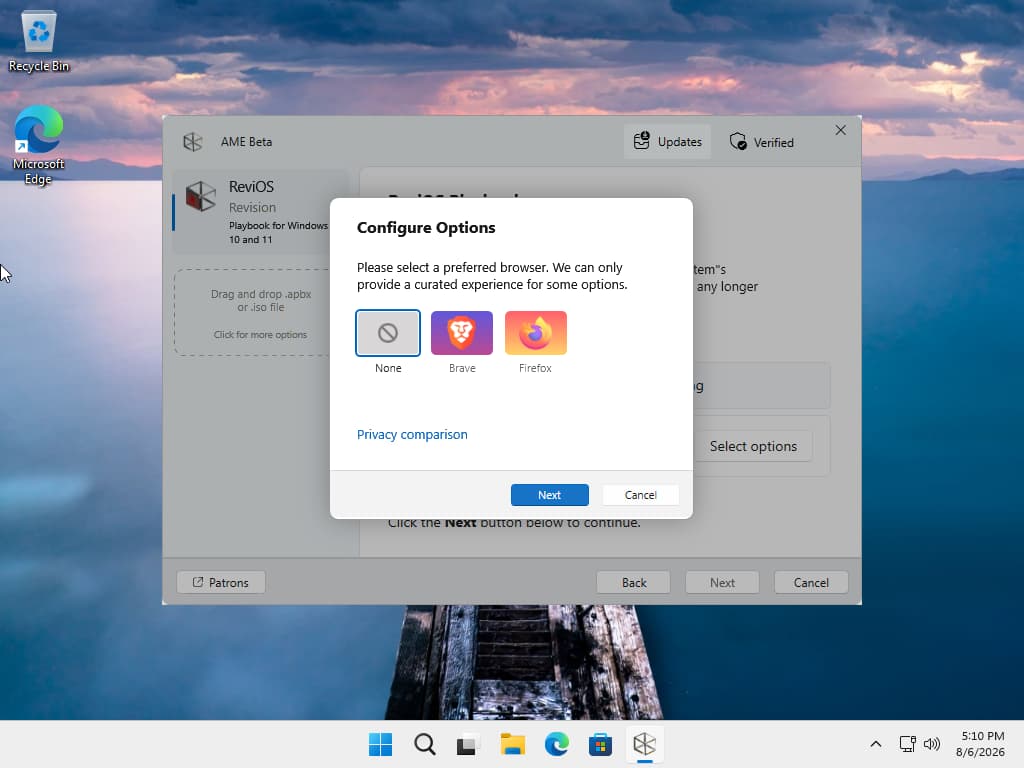
ReviOS offers to install Brave or Firefox. Note that Edge will be removed by the optimization.
- If your preferred browser is already installed, choose None.
- If it isn't installed and isn't in the list, download it through Edge now, before continuing.
Browser privacy comparison: https://privacytests.org/opens in a new tab
Click Next.
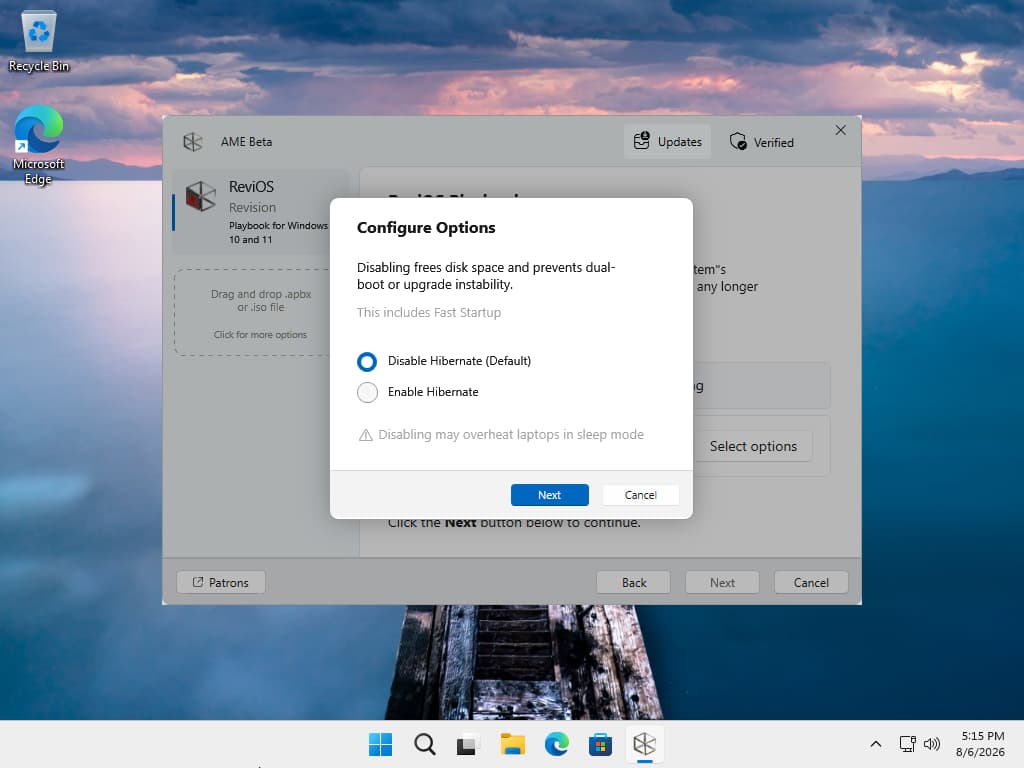
Hibernate: leave it enabled on a laptop, disable it on a desktop where it does little but consume disk space.
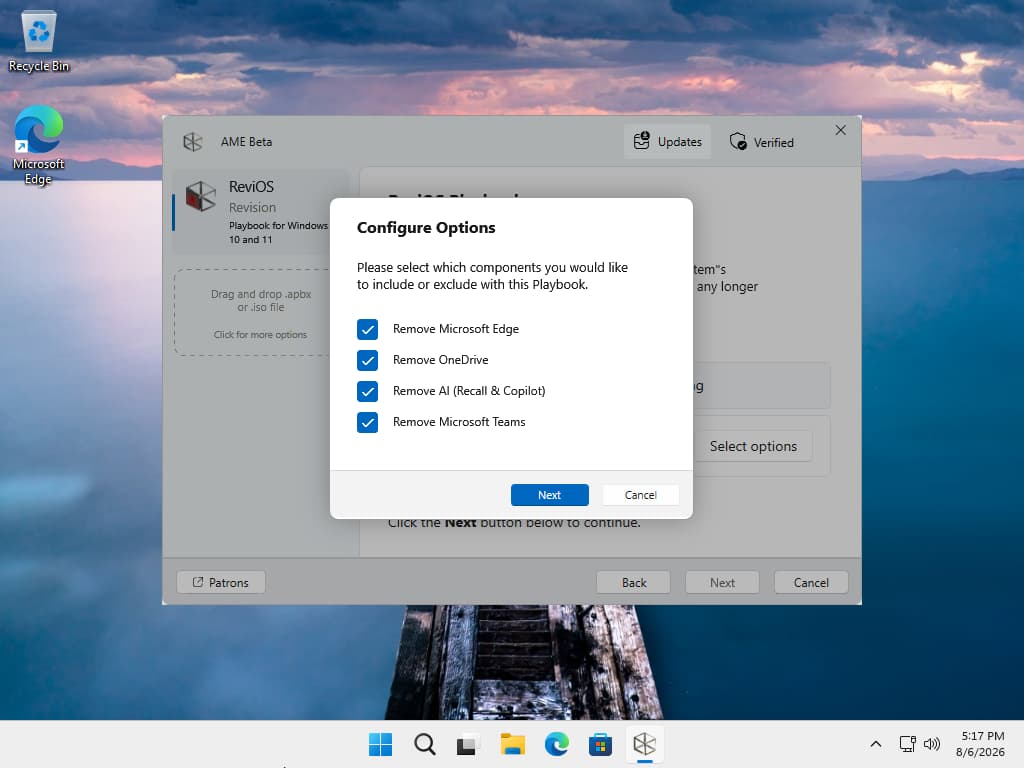
Components to remove. Check what you don't use: Edge, OneDrive, Recall and Copilot, Microsoft Teams. If you use any of them, leave it unchecked.
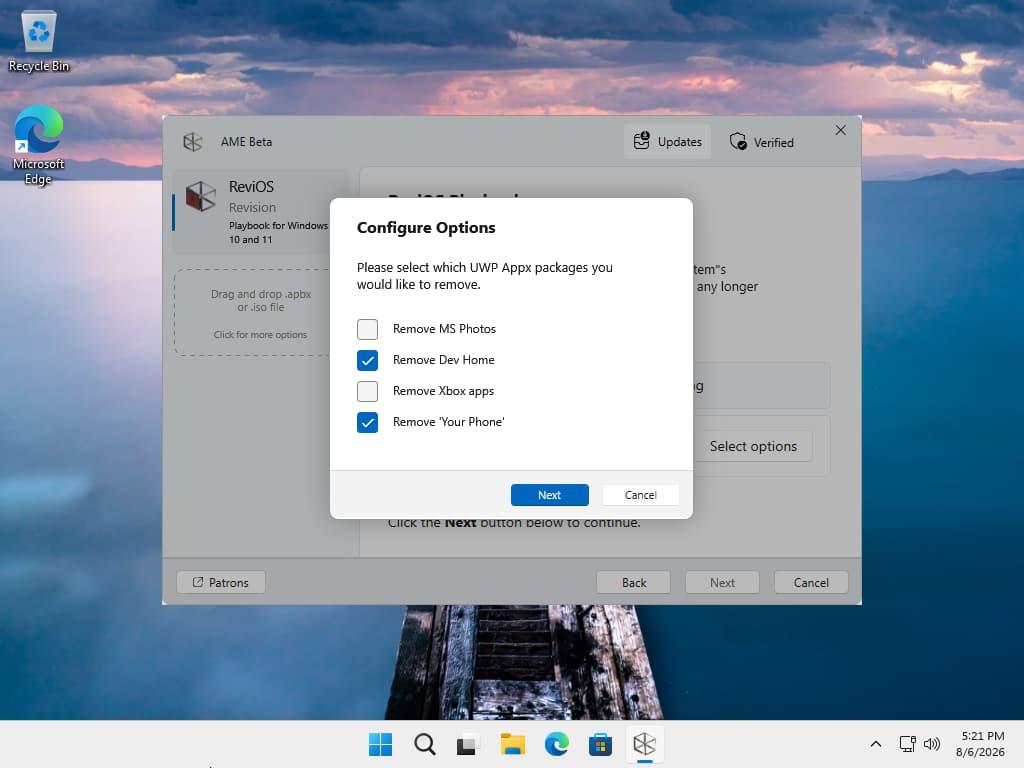
Same idea here. I'd suggest leaving MS Photos unchecked, since the default viewer is genuinely handy. If you game, leave the Xbox Apps as well.
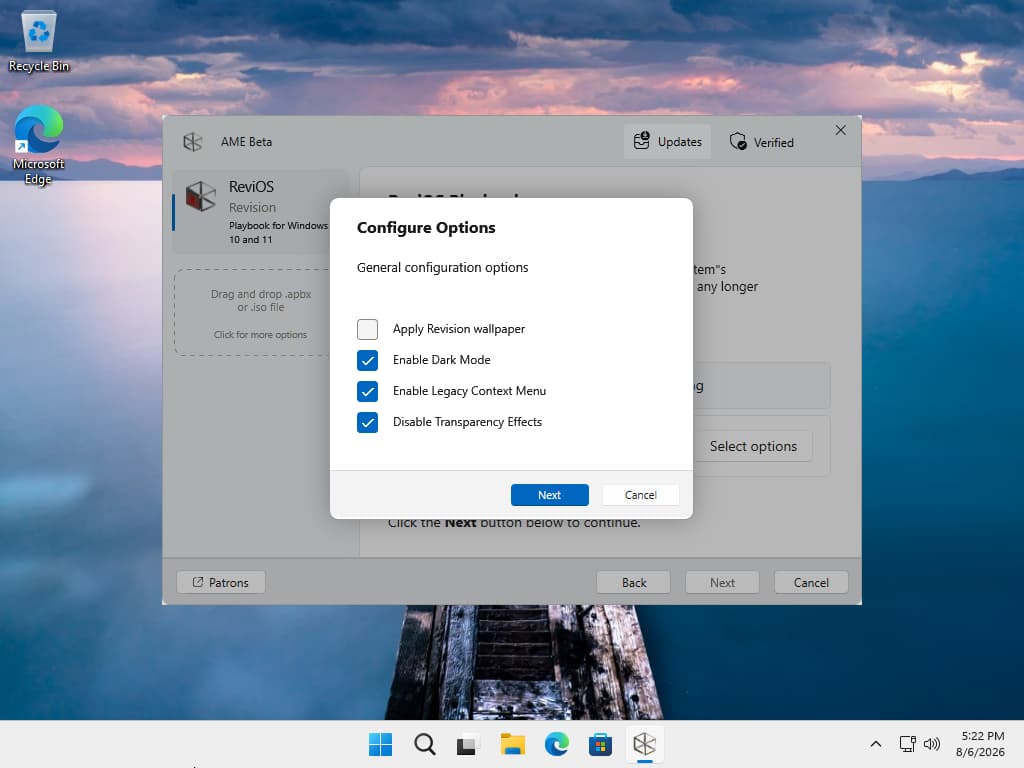
Appearance settings. Checking everything works well, except Revision Wallpaper if the bundled wallpapers aren't to your taste. Dark mode looks good on Windows 11.
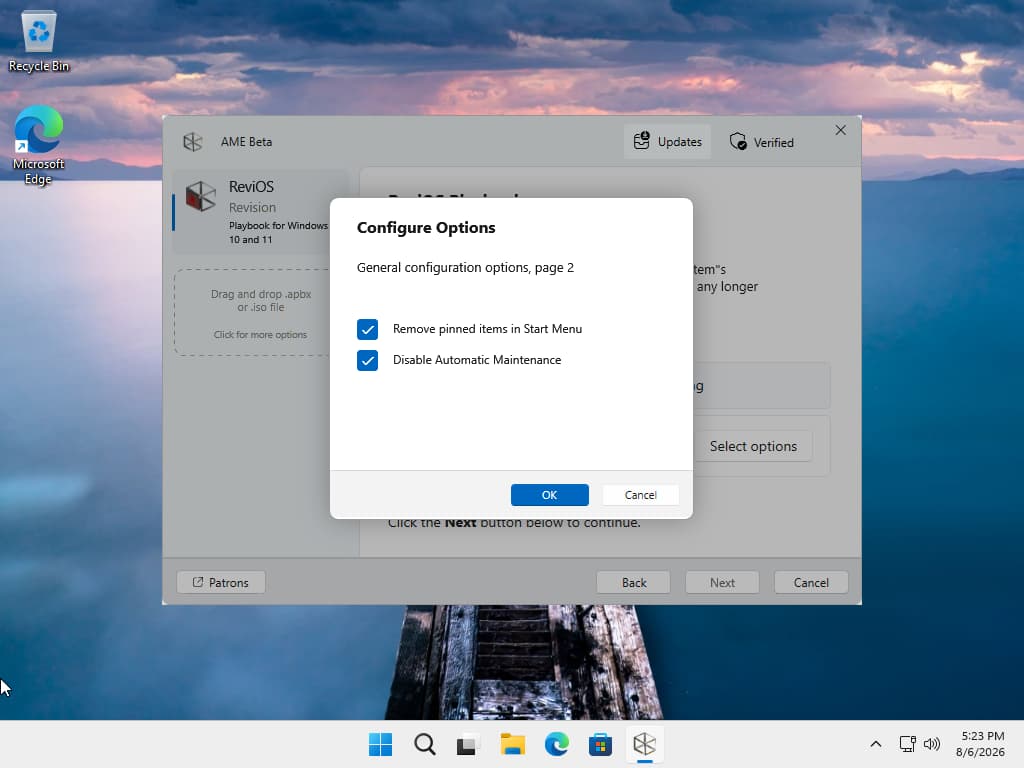
Check everything, then Next.
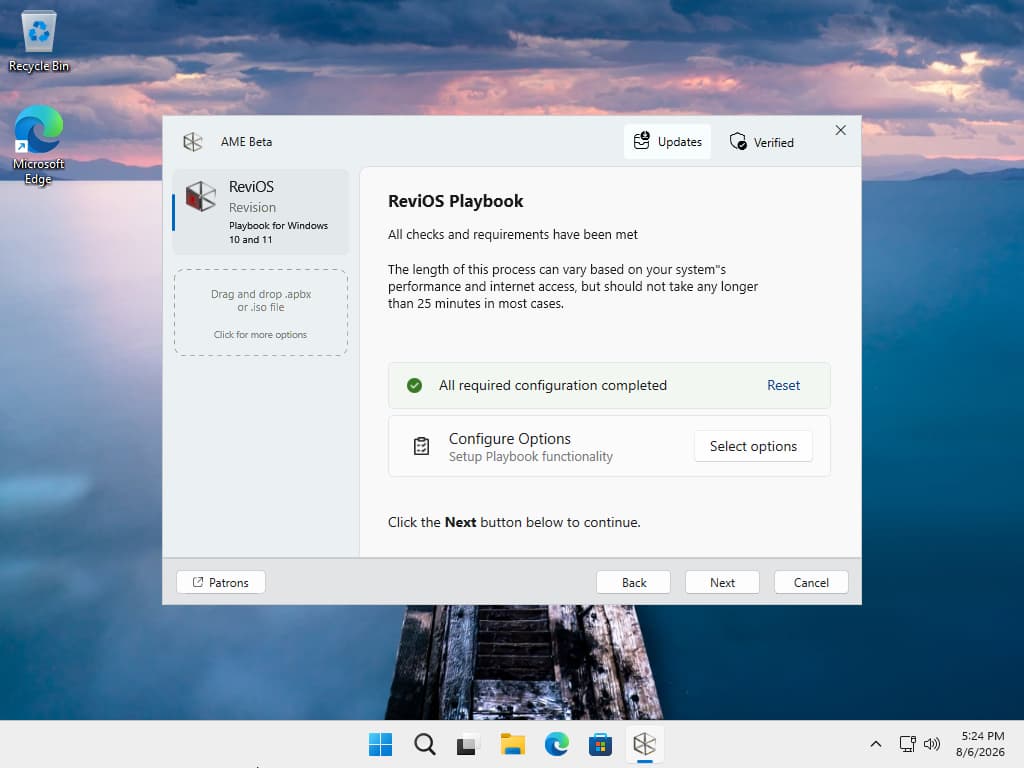
Summary screen. Click Next, or Reset to go back through the selections if you made a mistake.
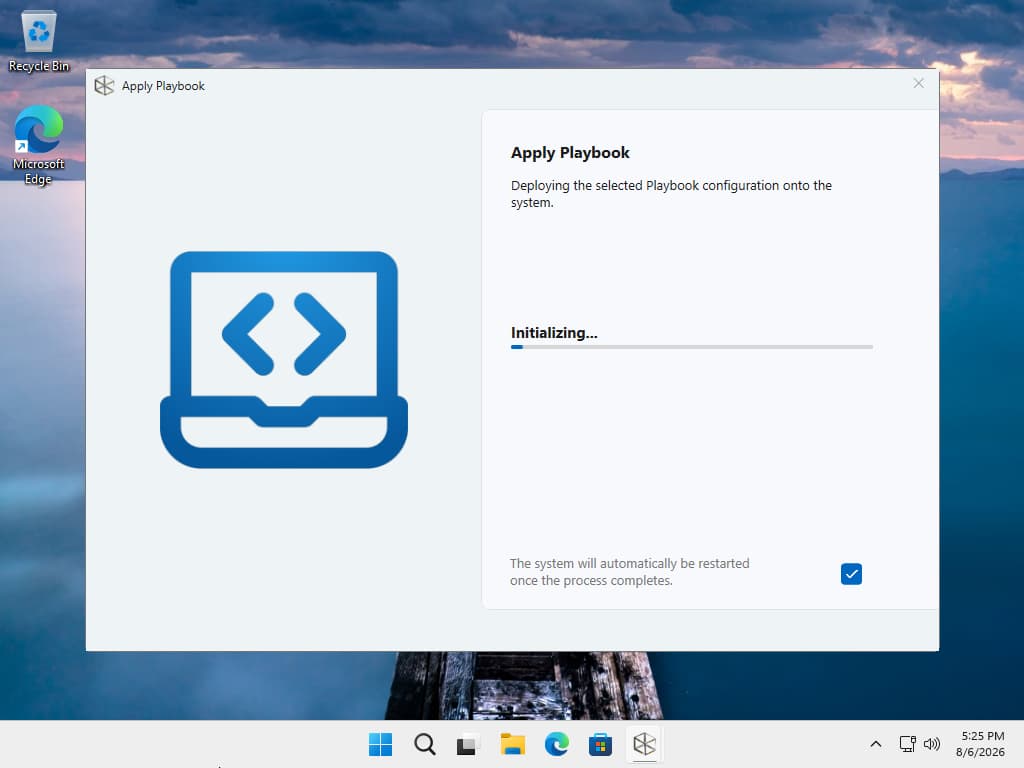
Don't touch anything until the restart. AME Wizard will offer to reboot: accept, or let the countdown finish. The background may turn gray or black, which is normal.
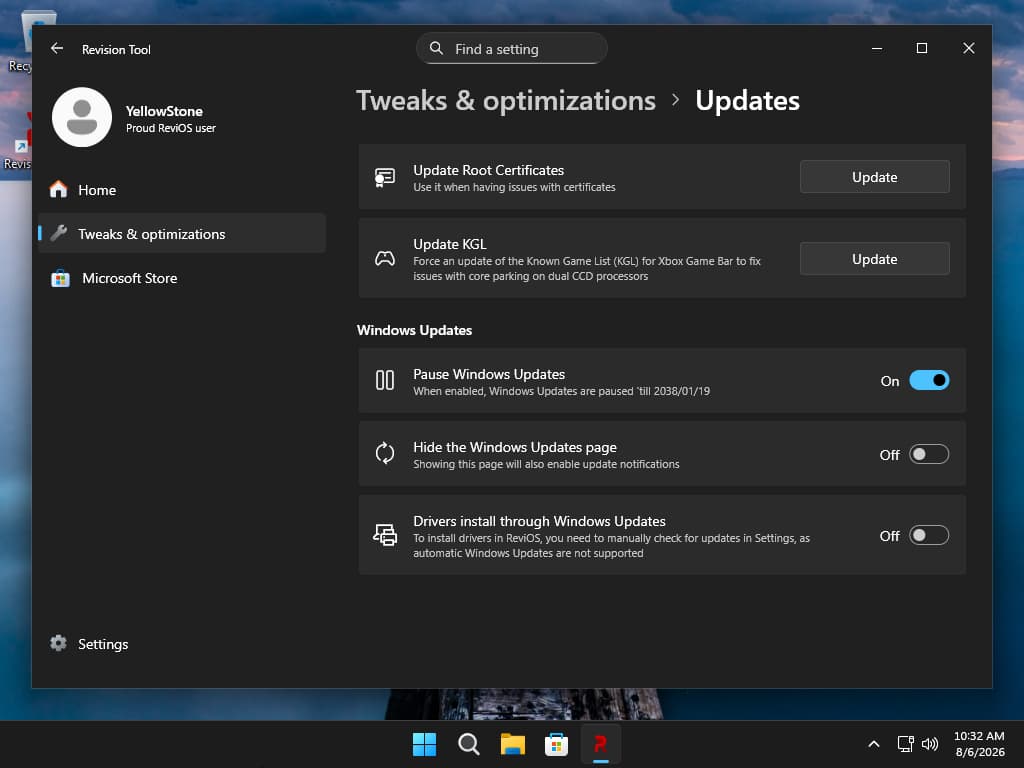
Essential final step: turn updates back on
Open Revision Tool from the desktop (the red R icon), go to the “Tweaks & Optimizations” tab, then Updates.
ReviOS pauses Windows Update by default, all the way to 2038. Turn it back on. Without updates your PC stops receiving security fixes, and known vulnerabilities stay open indefinitely. No amount of extra smoothness is worth that.
While you're in there, confirm that Windows Defender is enabled.
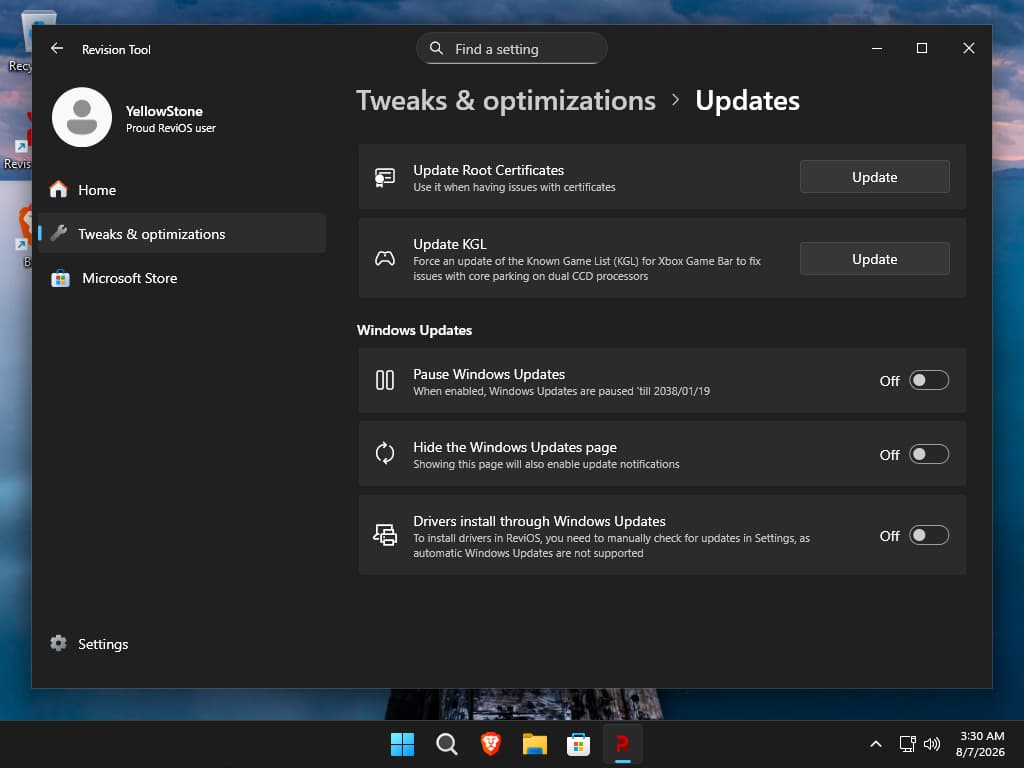
“Pause Windows Updates” now reads Off, which is the state you want. Compare with the previous screenshot, where it was On — that is the setting you are undoing.
Your PC Is Ready
One last pass before calling the machine finished:
- Windows is activated (Settings > System > Activation)
- Device Manager shows no yellow exclamation marks
- Windows Update has nothing left to install
- Windows Defender is on, or a third-party antivirus is installed
- A restore point has been created (search for “Create a restore point” in the Start menu)
- Consider encrypting the drive, especially on a laptop — and store the recovery key somewhere other than the PC itself. A dedicated guide on VeraCrypt is coming soon.
- A backup solution is set up — this is what saves you from doing all of this again in a panic
- Your data has been restored from your backup
Keep the USB drive as it is. It stays reusable, and it's a valuable troubleshooting tool the day the machine refuses to boot.
Voluntary contribution
This guide is free to read in full and stays that way. If it saved you time, you can contribute toward the cost of writing and maintaining free material. Nothing is unlocked, reserved, or promised in return, and nothing about this guide differs for contributors.
A contribution can be refunded on request within 30 days — see the Refund Policy.
Optional, and the amount is chosen entirely by you. A contribution is not a purchase, does not create a client relationship or support obligation, is not a charitable donation, and is not tax-deductible.
Want this done on your own system?
Paid consulting is a separate engagement with an agreed written scope. Access, deliverables, and billing are confirmed before any implementation work begins.